Stencils, Stencilling, Cutting, Printing, Paper, Help, Advice, Patterns, Designs, Granville
Lino Printing
My lino printing started as a natural extension from stencilling. I read a book which demonstrated a wide variety of printing techniques and was drawn by the finished effect of lino prints. They seemed perfectly imperfect in a strange sort of way. You will never see a perfect lino print - it's their variation in texture, the slight splashes of ink from the printing process itself, the marks of the cutting tool and the marked differences between each print in the same series which makes them so unique. Lino printing as an art is far removed from your childhood experiences although it can be done by anyone at any level with as little or as much equipment as you can afford. It's worth adding that cheap tools and equipment don't necessarily produce poor prints.
One warning though - lino printing is addictive. Once you start you will be hooked.
One warning though - lino printing is addictive. Once you start you will be hooked.
|
|
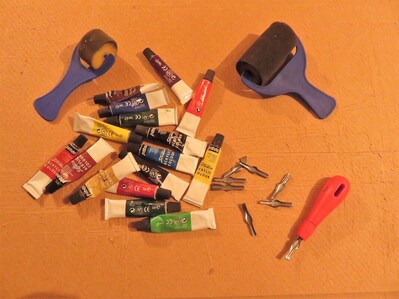
You can begin lino printing with the most basic of tools. My first prints were done with a set of acrylic paints and rollers from The Works and a very basic set of disposable cutters . |
Once you have designed and cut your printing block there are many ways of producing a print but all of them depend on pressure in some form or another. In an ideal world you would use a heavy purpose designed press but these really are cost prohibitive (unless you are lucky enough to live near to a printing school or co-operative where you may be able to rent studio space by the hour to produce your final prints). I tried several options and settled on a rolling pin with a purpose designed jig which I glued together from bits of lino and hardboard.
I have tried to specialise mostly in reduction prints. This is where I carve part of a design into my lino before producing a number of prints in one colour. Once I've printed sufficient for my run (plus a good number of spare extras) I continue to carve the same block before printing the same sheets again with a second colour. This means that the sections I've removed between the first carving and the second remain on the paper in the first colour and all the rest is covered again by colour two (I hope this makes sense nut is not there are many tutorials on the internet) . By constantly repeating this process you can build up a multi layered, multi coloured print. This process is known as reduction printing and can have as many as 5 or 6 coloured layers.
It does demand two important things though. Firstly that the paper is exactly aligned in the same place for each successive print. This is know as registration and there are many different ways of achieving this. I came up with my own using the jig and rolling pin design shown below. Just to add that I use a marble rolling pin rather than a wooden one - I find the extra weight and smoothness helps me get a good pressure across the entire printing surface. The other thing to note is that in a reduction print you are destroying your block by further cutting after each print run so you must produce sufficient copies at the initial stage to allow for mistakes and problems. I usually print about 20-25 initial prints and end up with 10-12 good prints after five or six reductions.
|
|
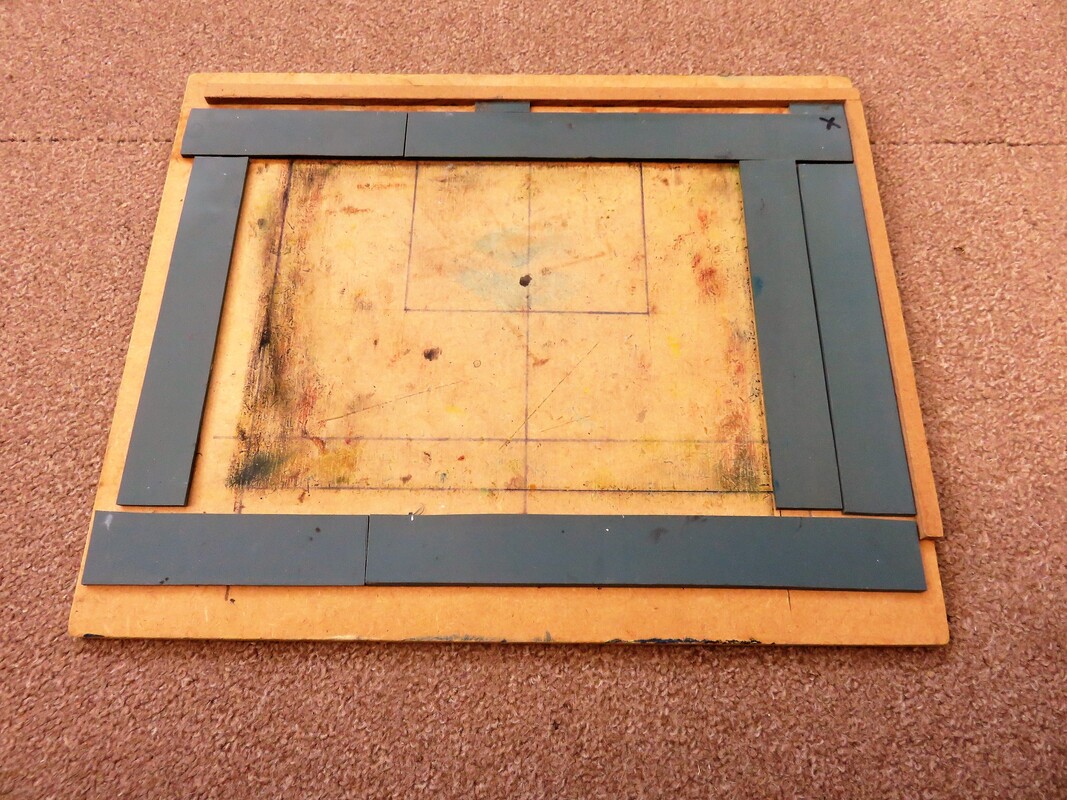
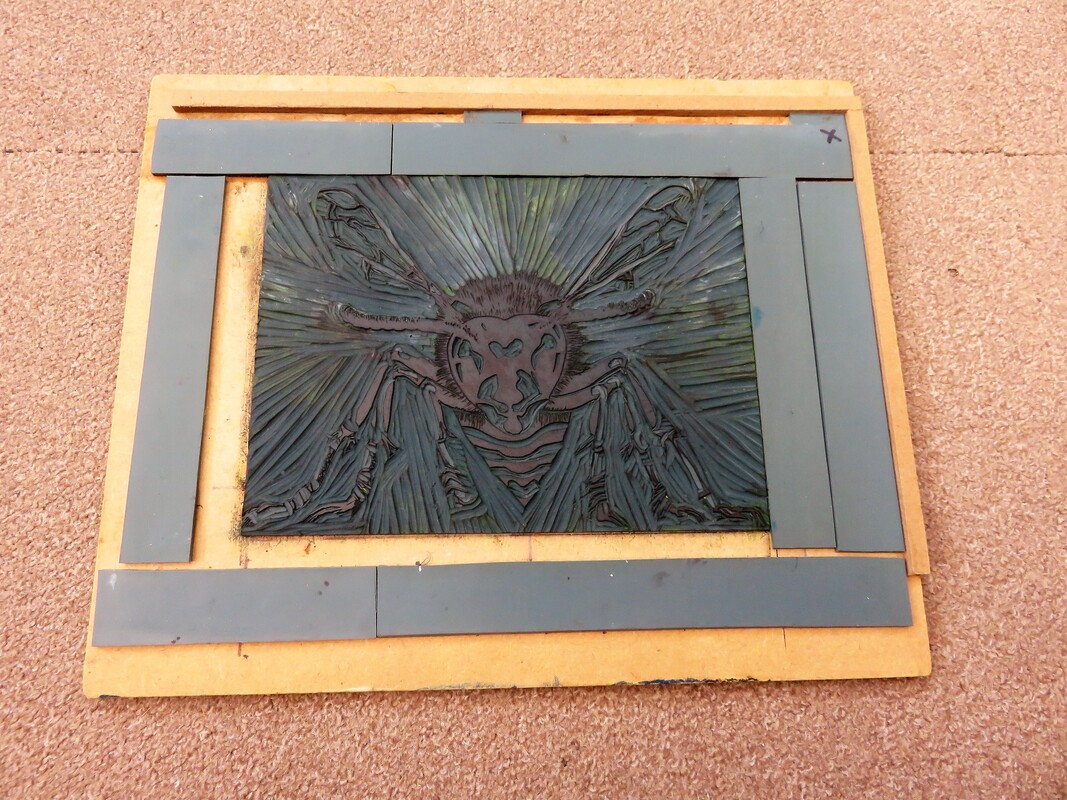
You can see how the cut block fits into the inner rectangle of my jig which is made from old lino strips and a piece of plywood. The printing paper then lies on top of the lino strips nestling into the into the corner marked with a cross. A slight wooden lip on the top and right prevents the paper sliding. The roller can then by rolled heavily across the lino strips two or three times to produce a print.
This particular jig was designed to precisely centre an A5 printing block on an A4 sheet of paper..
This particular jig was designed to precisely centre an A5 printing block on an A4 sheet of paper..
|
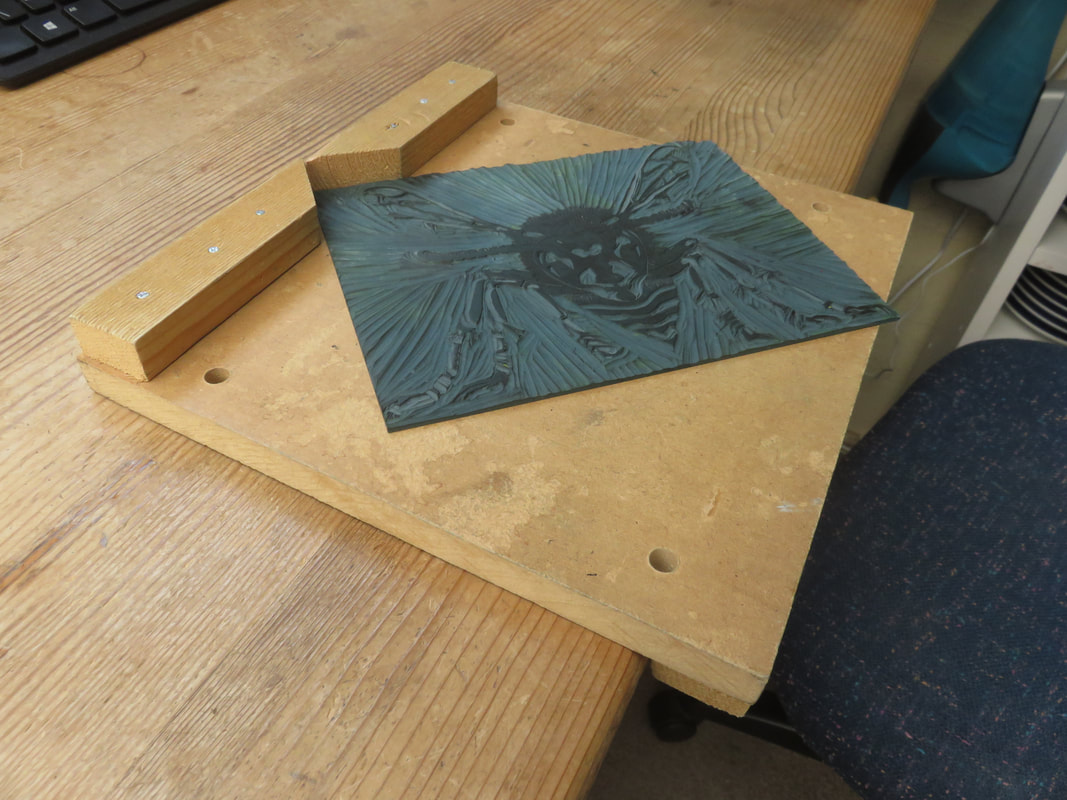
Lino cutters are very sharp and can be dangerous. You can make this cutting board, which allows you to keep your fingers away from the cutter, with a few scrap pieces of wood.
|
I would recommend starting out using acrylic paint rather than inks not just because of the cost more so that everything washes away so easily. Lino printing with inks can be very messy and hard to clean up. Purists may argue that ink produces a better finish which may be true but it all depends on your target audience. If you're printing to sell you should use inks but if you're producing items for your friends and family acrylics are fine. The only downside with acrylics is that you have to work quick, they dry very fast as opposed to inks which can take days and sometimes weeks to dry. That's fine if you have the space but it's a pain if you're doing a many layered print.
|
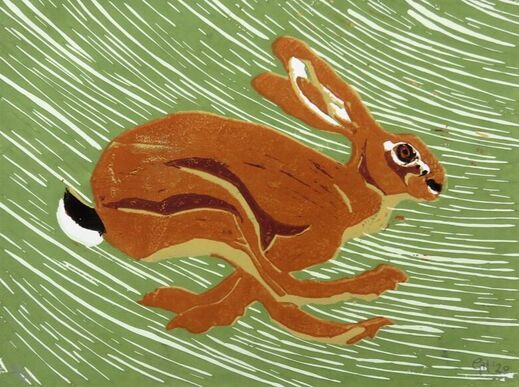
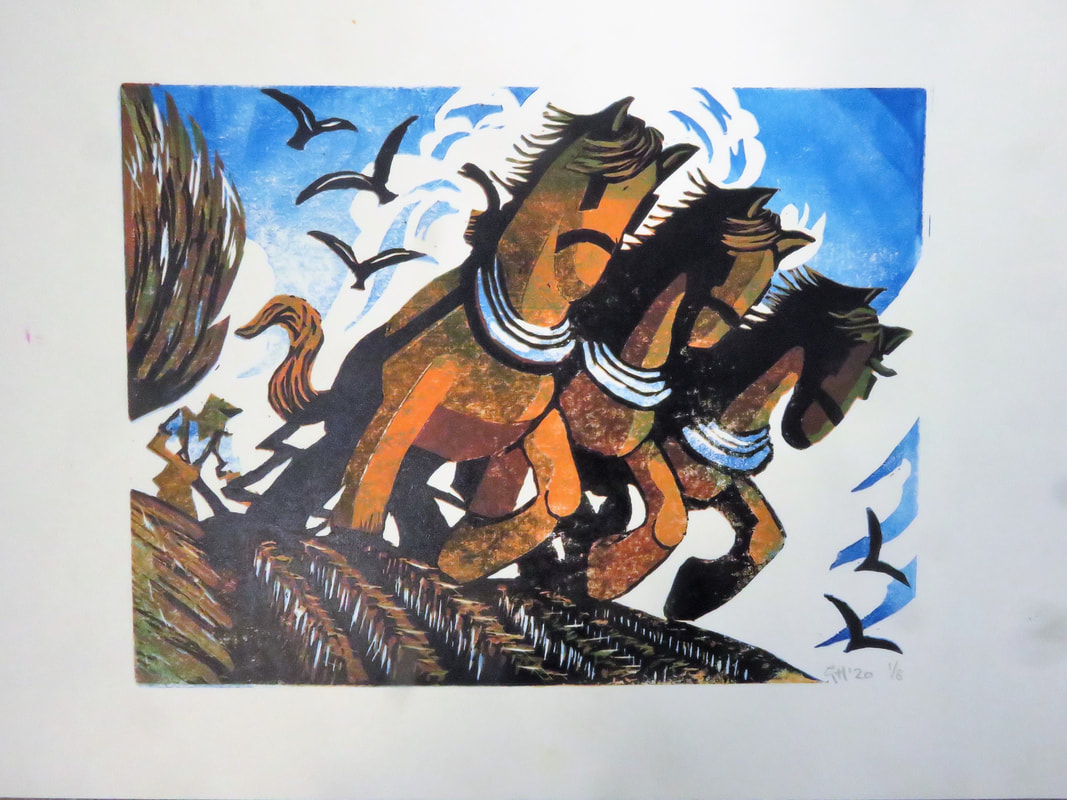
This was my first effort at lino printing using acrylics and the cheap tools ands rollers shown above. I have to say it was perhaps a little too ambitious since it's a five colour reduction print (three shades of brown for hare, green for the background and black for the highlights) and there were a lot of spoiled prints !! |
|
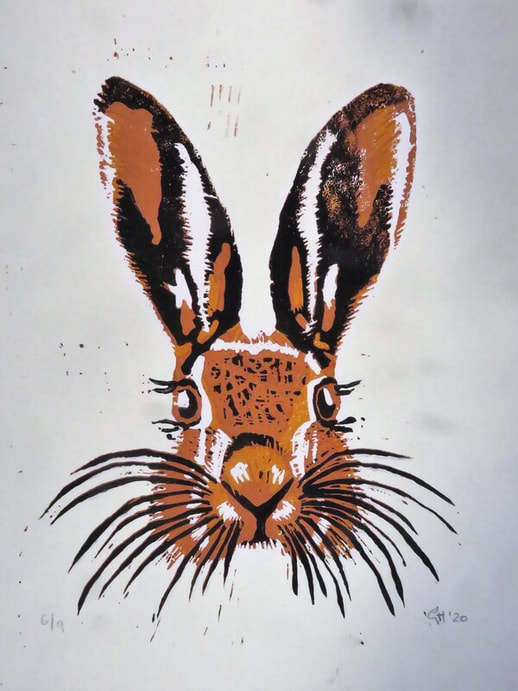
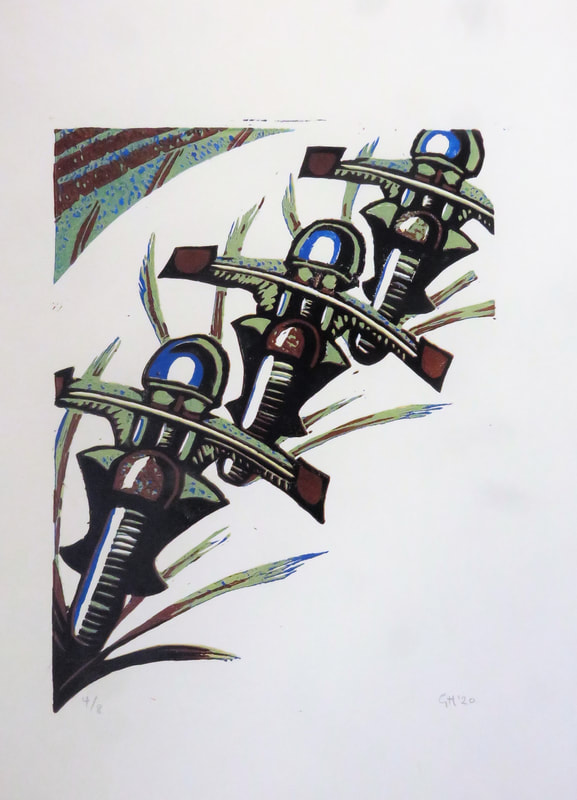
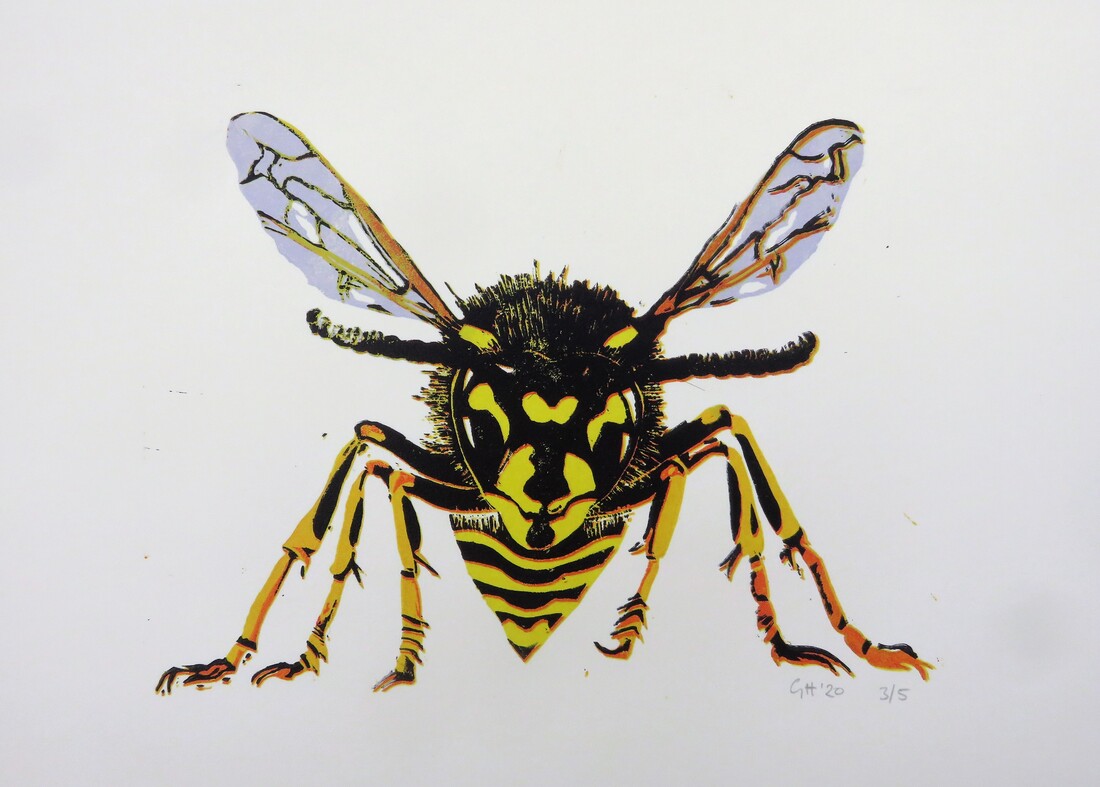
This was a very tricky four colour reduction again printed in acrylics |
The rest of the examples I've included here are printed with Caligo safe wash inks. These are vegetable oil based and hence water soluble which offer the benefits of ink printing but without the associated mess. They are a tad expensive but each tube lasts a long time and they do print smoother and more consistently than acrylics. If you are interested in using these search for "Caligo Process Inks" which allow you to mix a wide spectrum of colours from just three primary shades (you will probably need a black too). You can buy all the different colours individually but this is a much cheaper way of starting out.
|
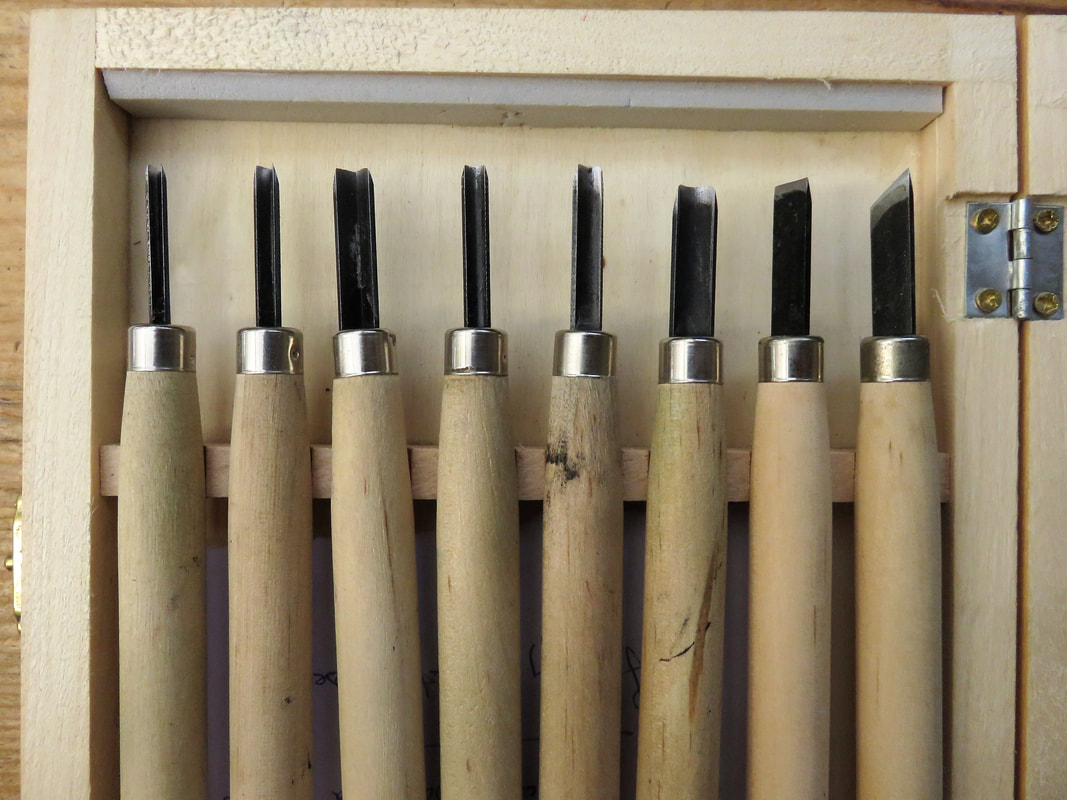
My upgrade to Caligo inks prompted me to upgrade my tools too. You can spend a fortune on cutters but this was a moderately priced set quite adequate for the type of work I'm doing
|
|
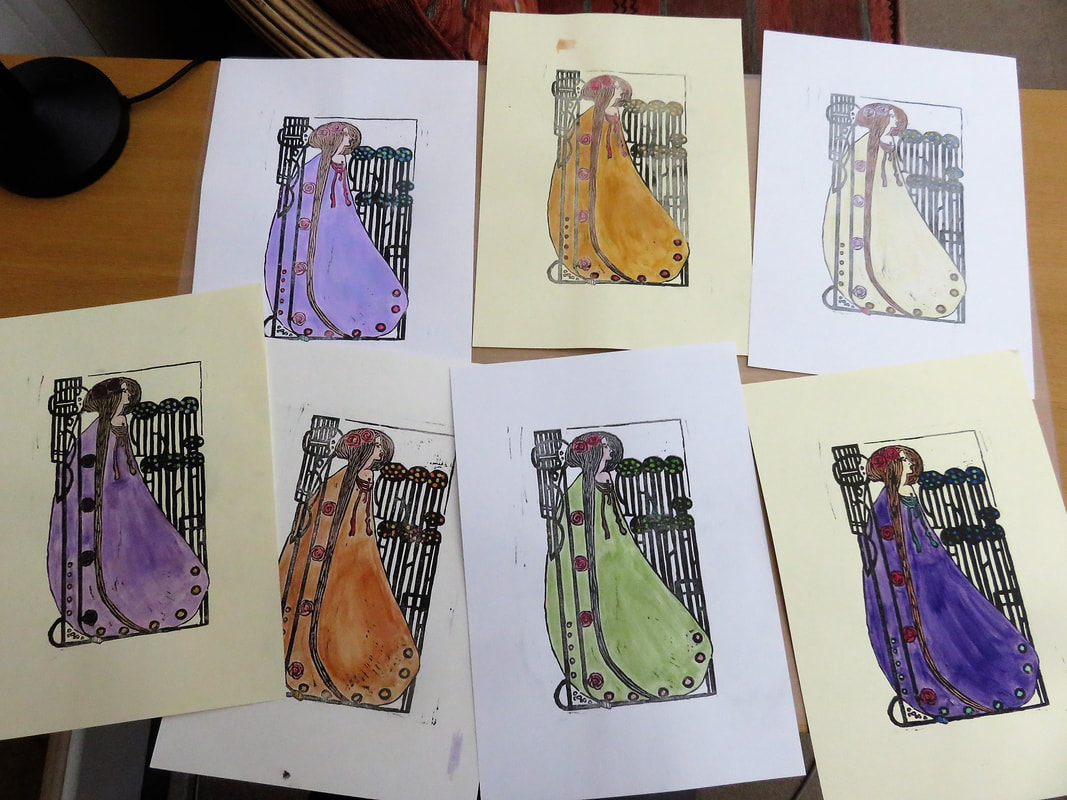
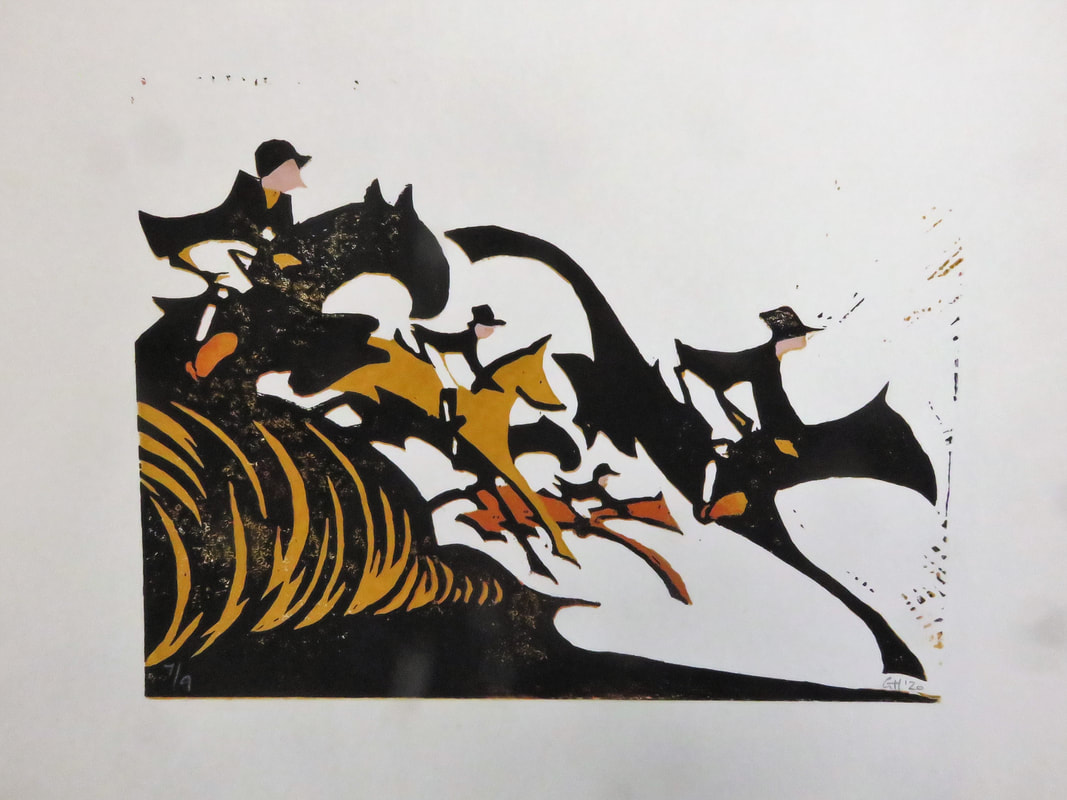
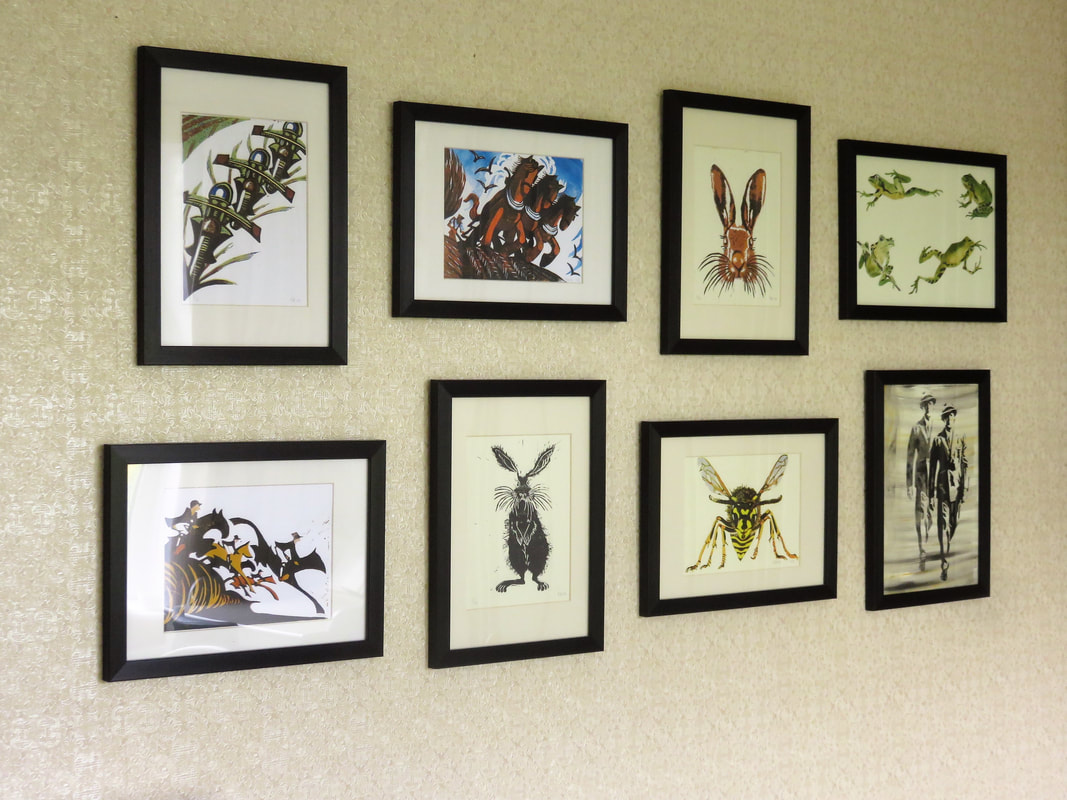
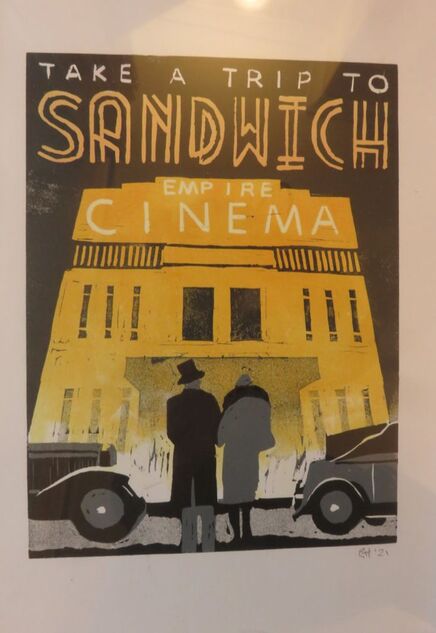
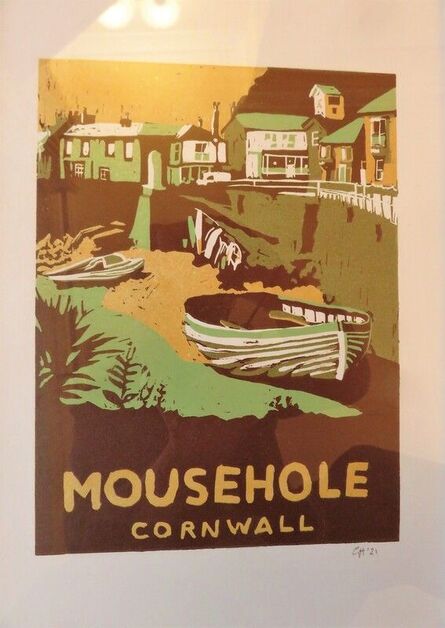
It will be obvious that none of these prints are my own designs but the next three, which are some of my favourites, are faithful reproductions of three very famous prints from the Grosvenor School of Art produced during the 1930's. If you look at the originals side by side with my humble efforts you can begin to appreciate how skilled these fantastic artists were.
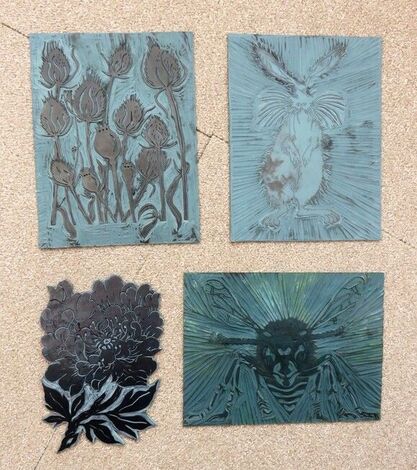
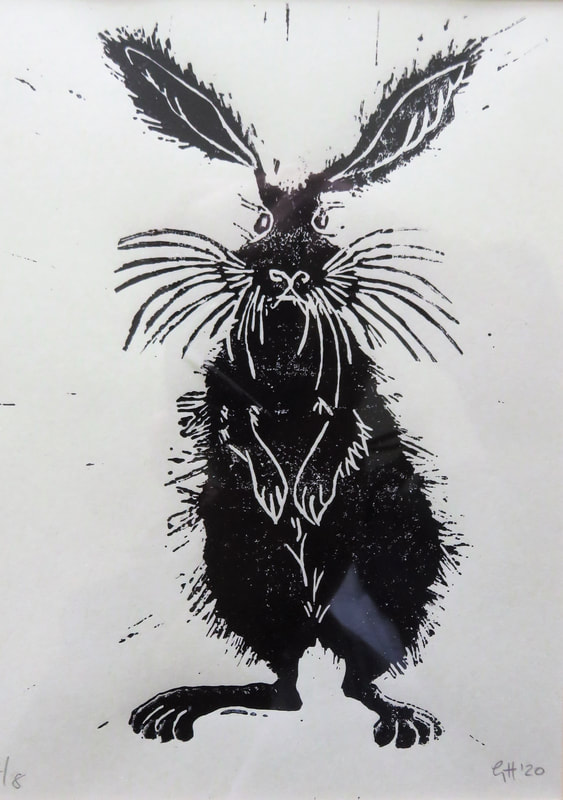
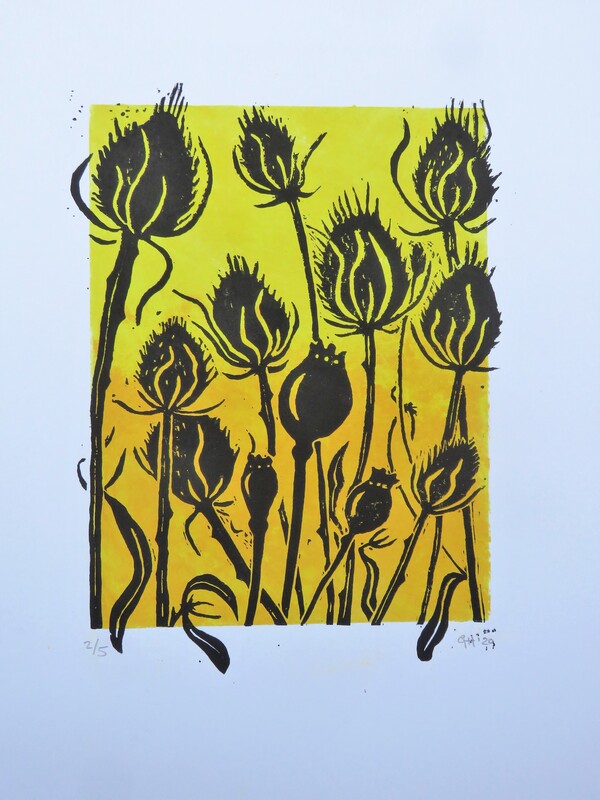
To give you an idea of other techniques the two examples below are not reduction prints. The hare is a simple single colour print which was very difficult to carve but produced a lovely end result (sorry about the glass reflection on his tummy). The teasels are a single colour print over a prepared background - this involved two lino blocks, one for the background and one for the tease
In contrast to reduction printing both these methods produce blocks which can be used again at a later stage if required.
In contrast to reduction printing both these methods produce blocks which can be used again at a later stage if required.
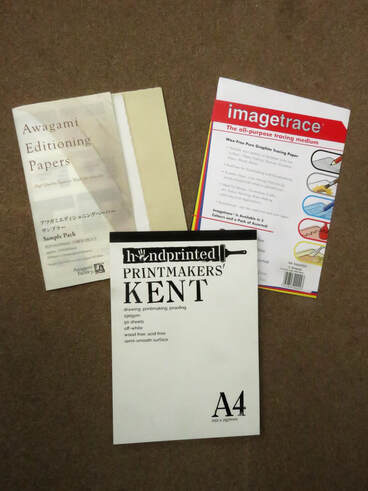
Finally just a few things to show how you can spend your money on non-essential items. A few of the things I've found useful are image trace (which is graphite based carbon paper - great for transferring your traced images without leaving a greasy residue like old fashioned carbon paper). printmaking paper (which is much heavier than traditional paper and a real luxury to use - although it can be a little too thick at times to take a good print without a professional press) and Japanese Editioning Papers (which have to be seen to be believed - some of them are so thin you can read through them yet they are so strong that they are impossible to tear)
And last but not least are frames and surrounds which really do make a difference to your finished print. Again they don't need to cost the earth or even be new ones, but you've worked hard to produce a print so make sure you display it well
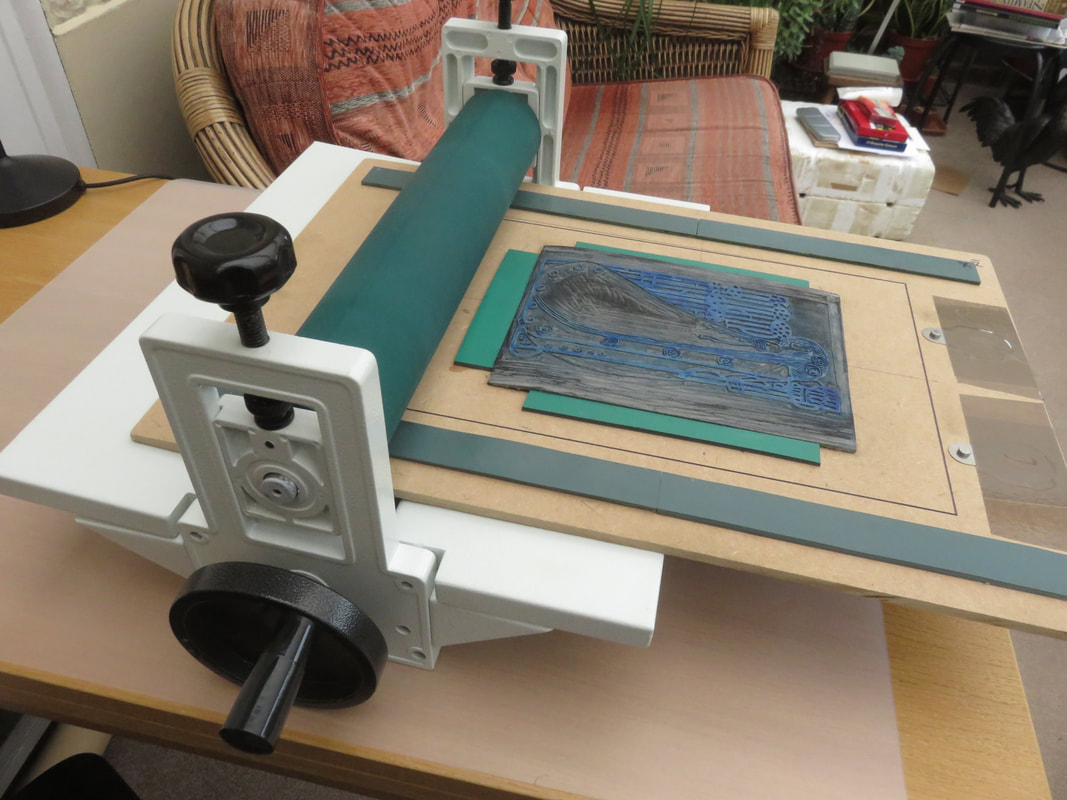
A couple of years on and lino printing has developed into a bit of a passion rather than a casual hobby. I spent more money on equipment and tools and experimented with new materials and techniques. The prints below (sorry about the quality of the photographs) were done using the small etching press shown which I managed to pick up at a bargain price and I've also started using something called Ternes Burton registration pins which are a marvellously simple invention allowing you to overlay multiple print layers with great precision.
|
|
And finally just a few experimental prints mixing watercolour with a lino print overlay which I'm currently playing with. As you can see some of them are far more successful than others !!!