Stained Glass, Copper Foil, Mistakes, Help, Advice, Patterns, Designs, Circular, Granville
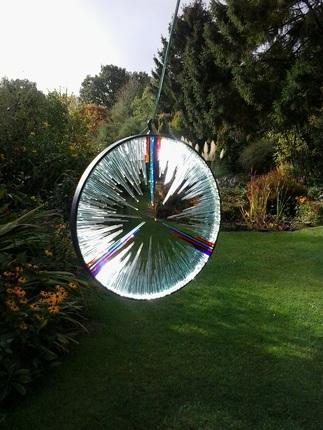
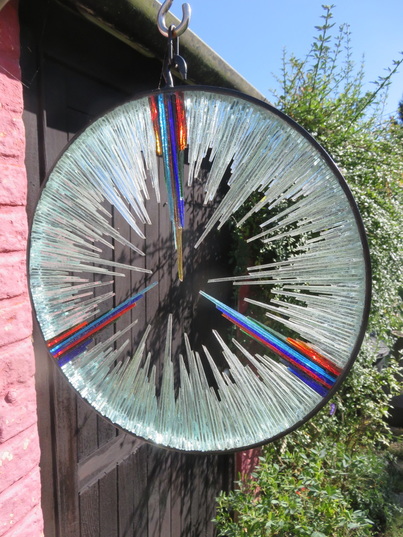
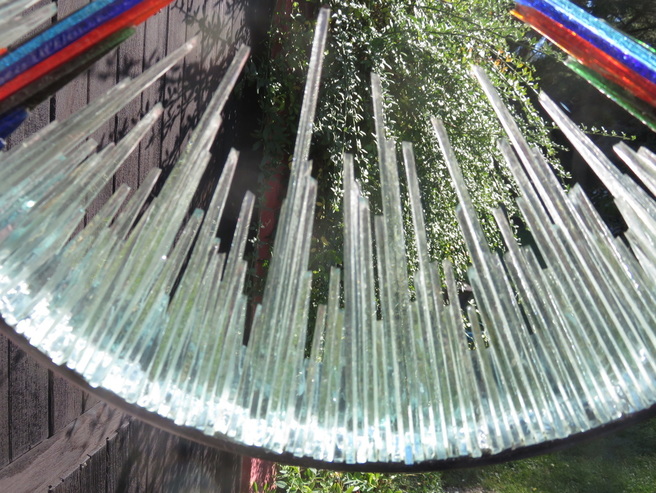
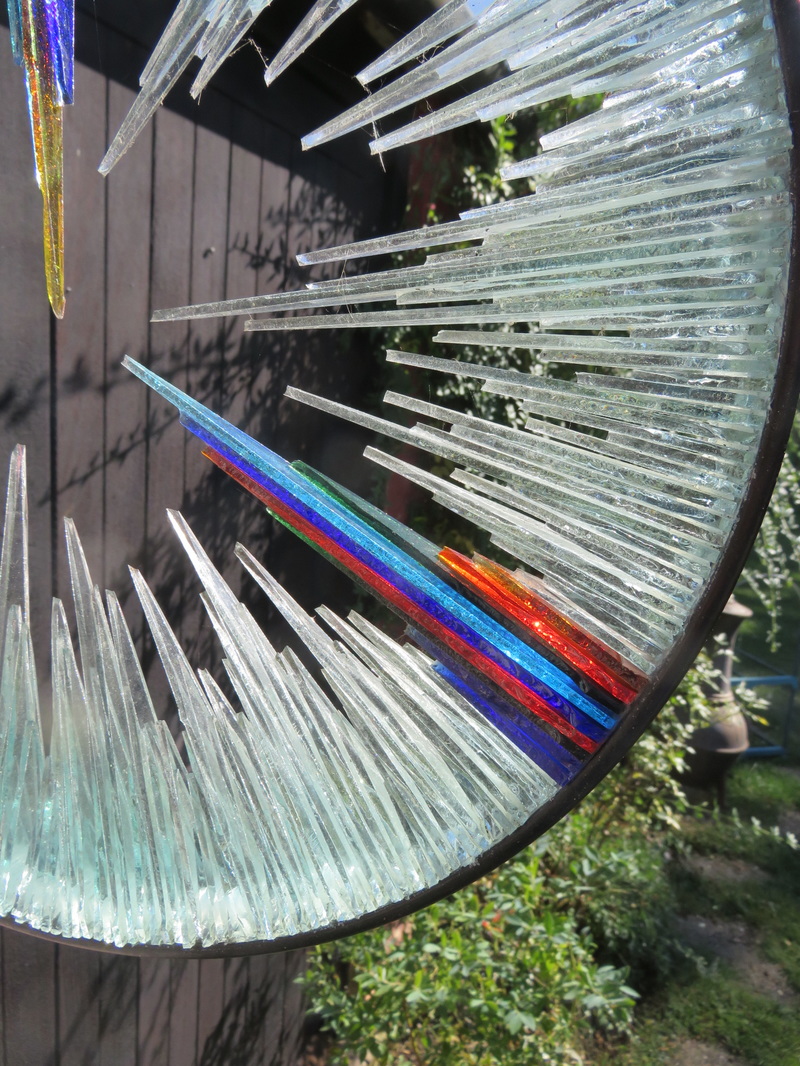
Sunburst
|
Several years ago we were visiting a stately home where they had works of art for sale in the garden. At the time I was stunned by one particular piece which was for sale for several hundred pounds. We couldn’t afford to buy it but I remember thinking “I could make one of those”. So the seeds were planted and once we were back home I set about tackling the problems.
At the outset I had no idea how this was going to be made and I hit a few unexpected obstacles along the way. |
The biggest barrier by far was the metal framework. I’ve never done any serious metalwork in my life and I spent ages searching for alternatives to a custom made frame. I passed many pleasant Sunday mornings touring car boot sales looking for a suitable circular structure. I even considered doing one in a different shaped frame but felt that the effect of a central focus point would be less effective. The only cheap alternative I could come up with was a bicycle wheel with the spokes removed and I almost set out on that course before a neighbour came up with a solution. He actually works for a metal fabrication company and offered to make me one at a reasonable price. Admittedly that’s not something everyone could do but I was so eager by now that I even asked him to make me two. This would have been prohibitively expensive normally so I do accept that most people would need to find an alternative. The cycle wheel seems the best alternative I can come up with and indeed I’ve recently seen a lovely stained glass wheel which was done by leaving some of the spokes in and connecting them here and there with odd shaped pieces of coloured glass.
|
|

|
|
|
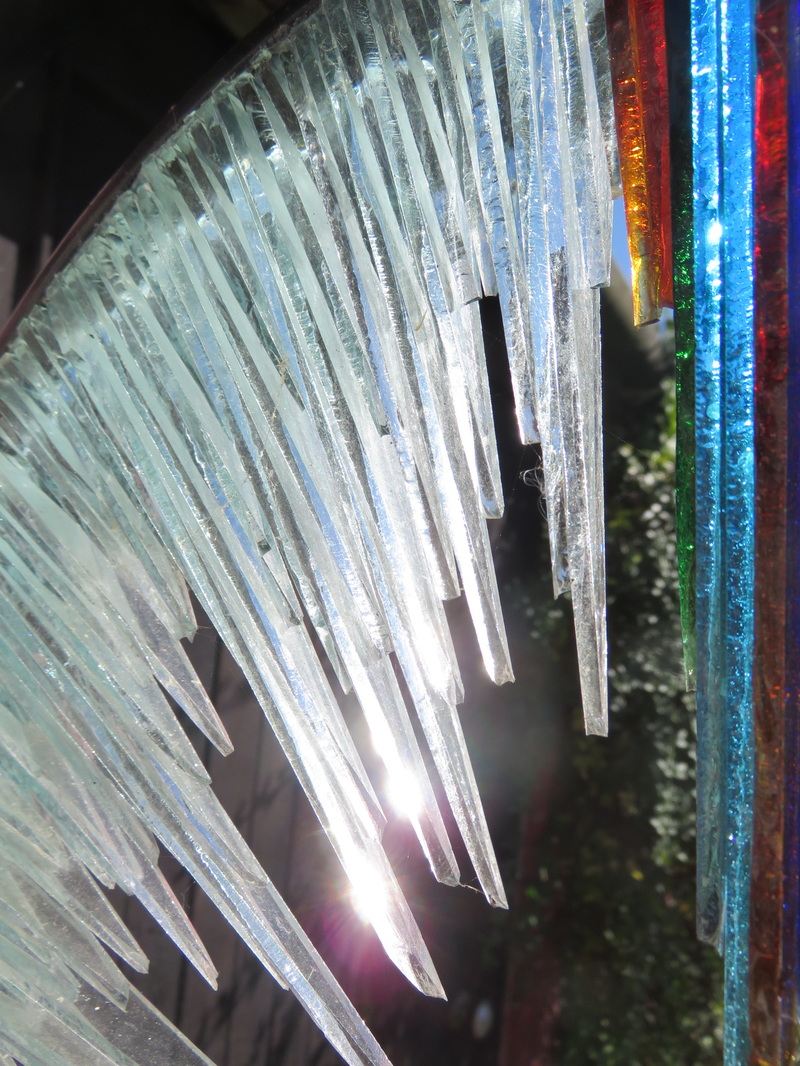
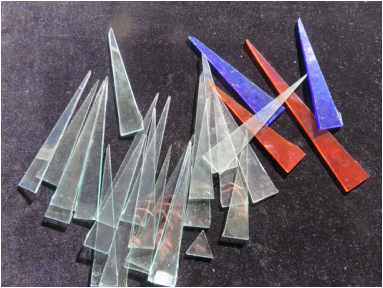
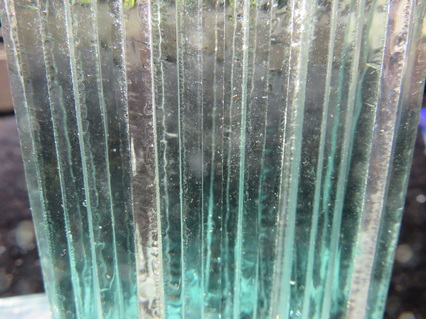
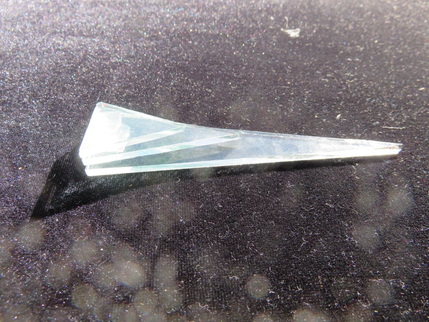
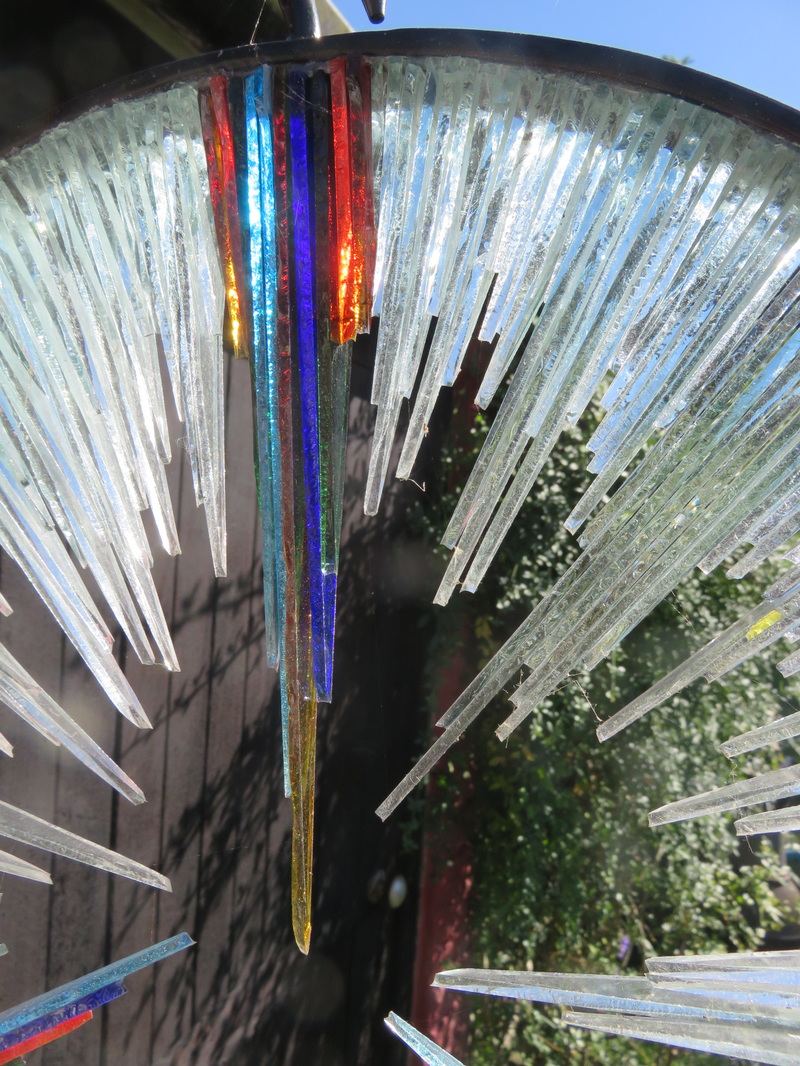
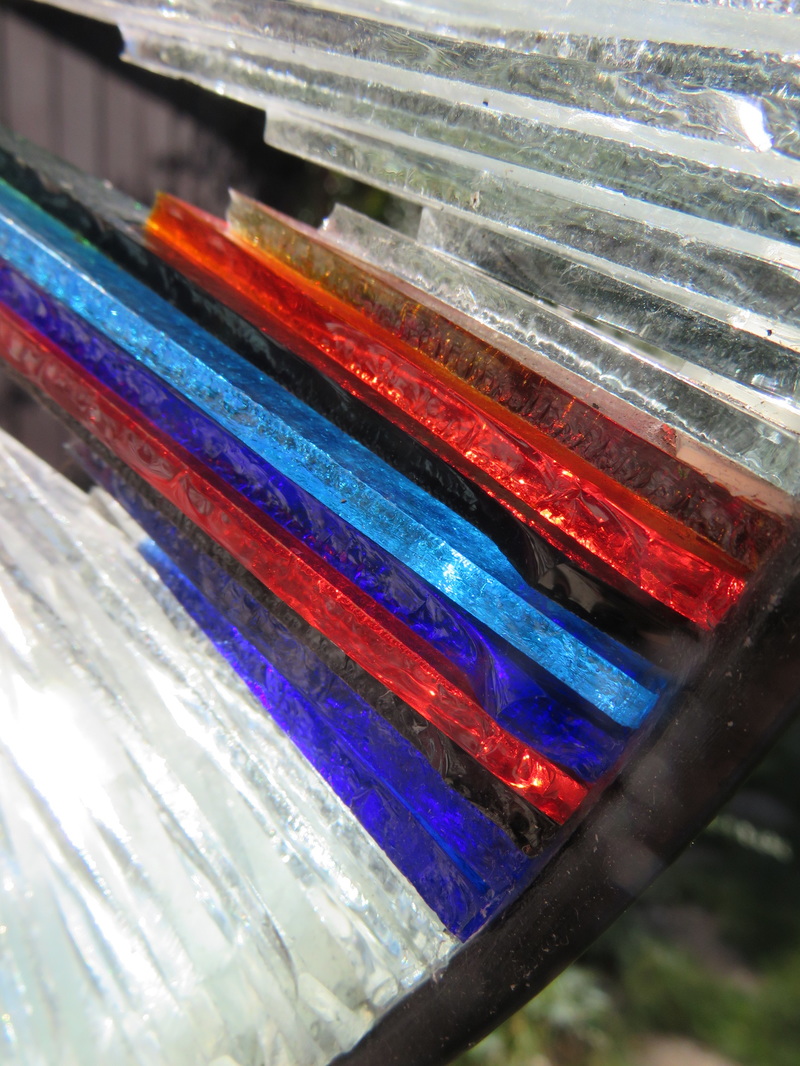
The shards themselves are roughly cut from plain glass sheet. I cut large quantities of triangles in about five or six varying heights (plus two or three very large ones and a small number of coloured ones for the features). Very sharp triangles of glass would normally be quite difficult to cut accurately since the points break randomly. However for my project this random effect was just what I wanted to achieve in order to reflect the sunlight better. It did mean that some of the pieces of glass I made were dangerously sharp and indeed the finished article needs to be kept well out of touching range of any curious admirers. People seem to have an overwhelming desire to see how sharp the points are ... |
|
|
|
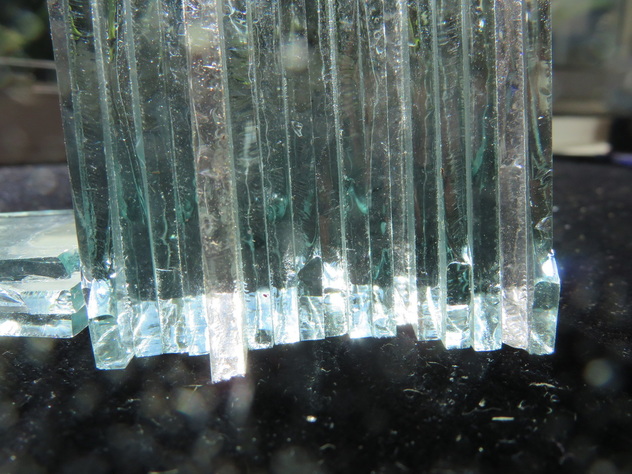
The shards needed to look random heights as they went around the circle which was harder than it might seem. I found it impossible to get the correct curvature with large quantities of shards so came up with the idea of making dozens of small stand alone sections – each containing just six or seven pieces. |
|
|
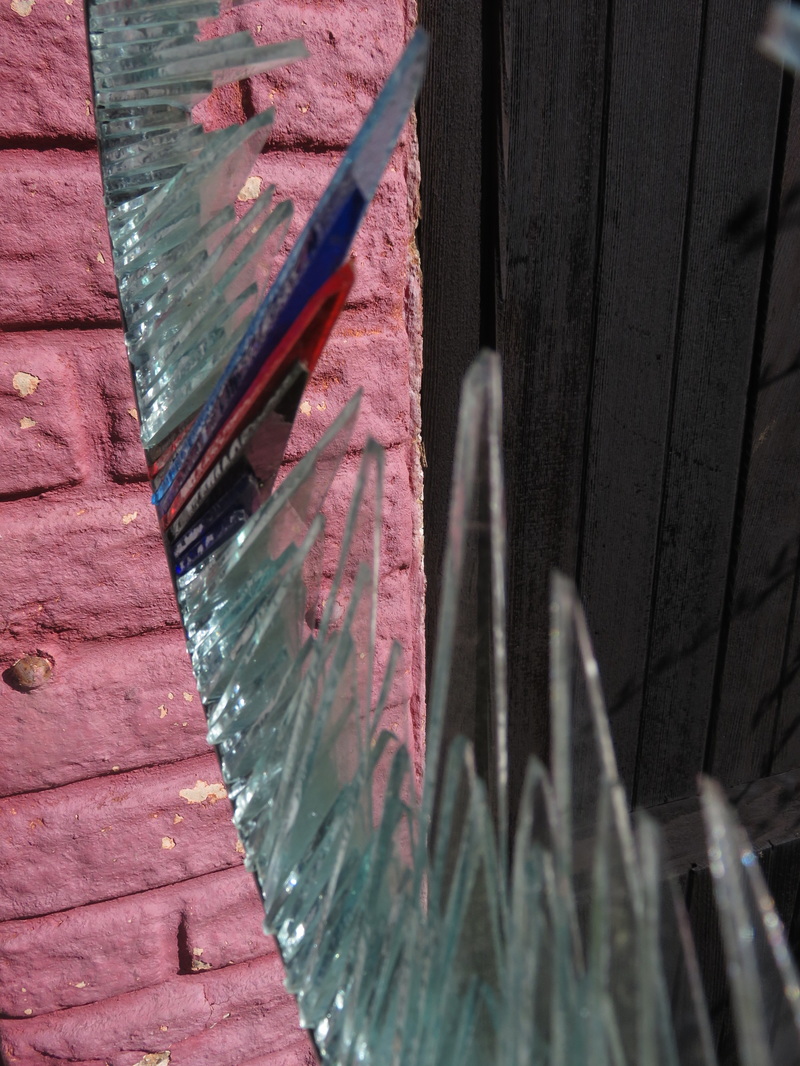
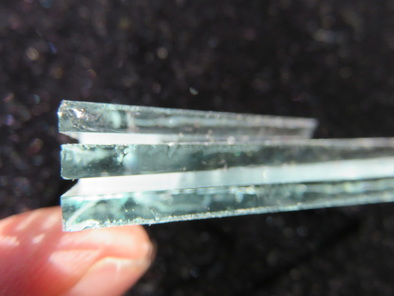
I practiced making a few of these and quickly realised that I couldn’t simply glue random sizes side by side. OK I was using purpose made clear rubber adhesive for glass (which is sticky nasty stuff to use) but there wasn’t enough flexibility in the adhesive to make my small sections bend around the curve of a 15” diameter circle. After a lot of trial and error I came up with the idea of using a very small piece of plastic as a separator between the base of each shard. Provided I used smaller shards in the middle of each section and larger ones on the outside I could make the whole piece bend inwards because of the extra clearance space caused by the plastic separator. So began the task of making enough of these sections to complete the full circle. |
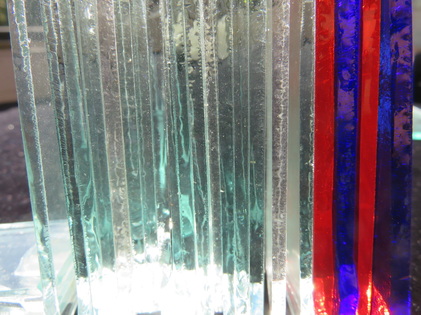
The sections containing the coloured shards were created more carefully and the very long shards were placed individually in the final layout stage. It was essential that all the longer shards pointed to the centre point so once I had all the pieces made I laid the whole project out on a simple circular template to make sure it fitted together correctly.
|
|
|
kThen came the satisfaction of gluing all these small sections into place around the rim. Care was needed in positioning the coloured and longer feature pieces and the fitting of the last couple of shards was tricky but apart from that it all went fairly smoothly.
As I said earlier the adhesive was messy to work with and it is obvious on closer inspection. However it dries clear, seems to be extremely weatherproof and doesn’t distract at all from the overall stunning effect so I’m more than happy with the result.
As I said earlier the adhesive was messy to work with and it is obvious on closer inspection. However it dries clear, seems to be extremely weatherproof and doesn’t distract at all from the overall stunning effect so I’m more than happy with the result.
|
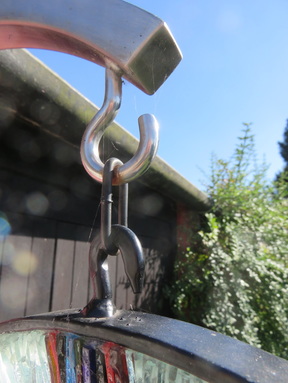
Hanging the piece had to be considered carefully since my friendly neighbour had attached a hook (quite logically) in the same direction as the circle. To turn the piece I had to use a single link of the strongest chain I could buy. If you do have a similar problem with any of your work can I suggest that you ask the shop to split your links before you bring them home – unless you have a really good pair of bolt cutters. I’m very proud of the end result. It looks gorgeous in our garden whatever the weather and is out in all conditions - although I do bring it inside during the worst of the winter months. |
At this stage I still had a spare circular frame available which I put to one side for use at some later date. It eventually turned into a partner for this piece which I called “Bubbles” (and which you can read about later) but for now I fancied a change from glass and moved on to a completely new challenge
