Stained Glass,Beginner,Panel,Landscape,learn,mistakes,patterns,instructions
Leaded Panel
|
I was in two minds whether or not to include this piece since all my other projects have involved significant work over a long period of time. This one, in contrast, was done within a couple of days. It is important to me however since it was the very first thing I created and the project which got me introduced to crafting.
For many years I had loved glass and indeed over that time had built up a collection of other peoples work. I had even been on a glassblowing workshop only to come to the conclusion that it was too difficult, too expensive and involved a great deal of capital investment (not to mention artistic ability). However when I took early retirement I had an opportunity to attend an evening class on stained glass. There, apart from a very talented teacher called Anna Conti, I met lots of genuinely artistic people who opened my mind to the possibilities. I haven't met Anna since that course but I would like to think that she would be pleased that she nurtured my interest in the subject. What I hadn't realised about evening classes was that many people attend year after year simply to use the facilities available (the course was held in the craft room of a local upper school). What a wonderful idea, shared equipment at a reasonable cost. Although the course was about stained glass, one girl there was using her time to produce a stunning glass mosaic whilst another was producing an amazing coloured door panel. |
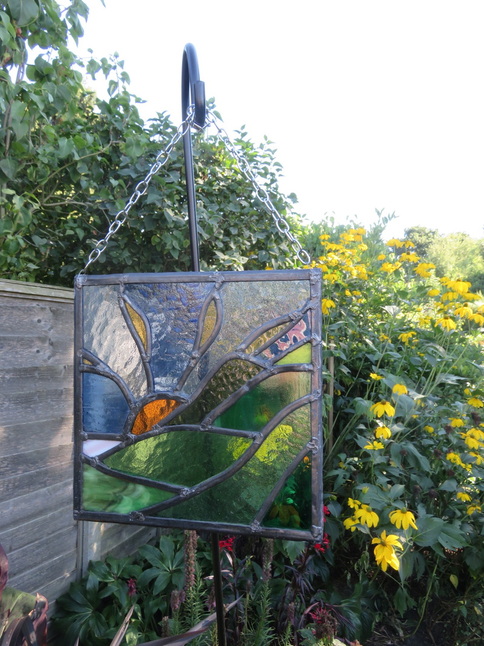
I made the panel above faithfully following the teacher's instructions. She asked us to draw a random landscape which it's meant to be - with the sun rising in the background. It is not my intention to teach you how to make leaded panels although the basic principle is that you insert cut glass pieces into either H-section or U-section pieces of lead depending on whether or not you want an internal joint or an external edge. Glass pieces can be difficult to cut precisely since there can be little tolerance between abutting edges and different textures and colours of glass are surprisingly variable in strength. Lead is easy to cut and form and once assembled the whole thing has to be soldered into position. If you do want to learn to produce leaded work there are many good websites and books available.
So I learned the tools and techniques and the end result was pleasing enough however it soon became apparent that leaded glass pieces were usually fairly big and could be produced comparatively quickly. No matter how beautiful they may be they were soon going to become a problem around the house - hence why this one is hanging in the garden. My wife would have liked me to produce a series of stand alone panels for the garden but, whilst I had the ideas, I did not have the appropriate metalworking skills or tools to produce a suitable framework.
Hence I chanced upon the wonderful craft of copper foil, which is very similar but more delicate miniature version of leaded glass, and managed to develop those skills whilst still attending my evening class. The wall sconces which you can see in the next section were my first major project using this technique.
