Stained Glass, Copper Foil, Mistakes, Help, Advice, Patterns, Designs, Window, Beamish, Granville
Beamish Window
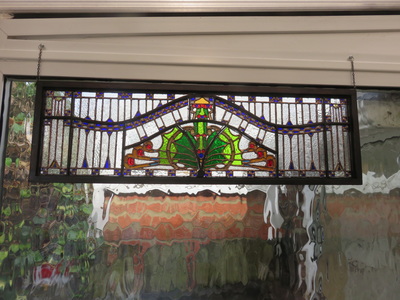
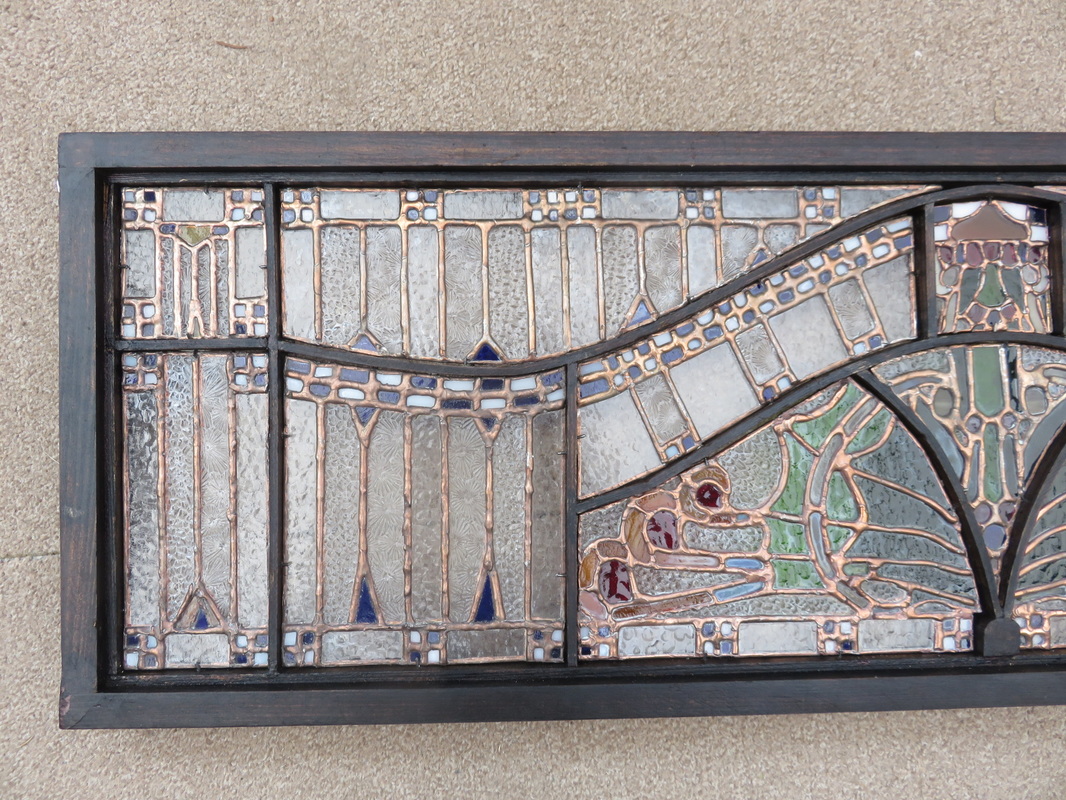
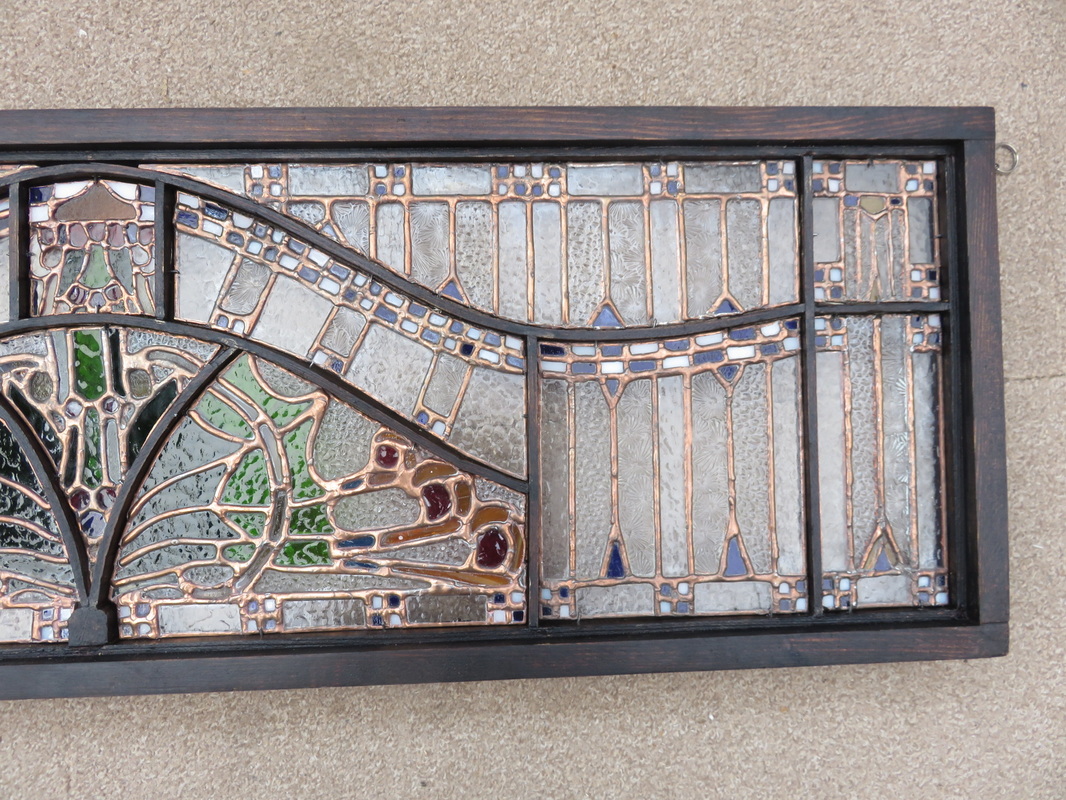
I’ve always been a lover of stained glass shop windows and have admired them in many places on our travels. The problem with much stained glass though is that it is just too big to store in any quantity. I’ve spoken to many stained glass artists who have moved onto other interests for that reason alone. We happened to be at Beamish Open Air Museum early in 2016 where they have the original full sized version of my window. I was so impressed that I photographed it in some detail simply to look at the possibilities when I got home.
I wanted to produce a miniature window which had to be no more than 30” wide. This gave me two major problems though, firstly the frame, which involved a number of curved sections, and secondly the very small sizes of some of the component pieces. I’ve never seen a stained glass window reproduced in miniature before and couldn’t find any advice on the internet. Even the place I buy my stained glass from were very sceptical about my chances of success. Nonetheless I was determined to at least try.
I wanted to produce a miniature window which had to be no more than 30” wide. This gave me two major problems though, firstly the frame, which involved a number of curved sections, and secondly the very small sizes of some of the component pieces. I’ve never seen a stained glass window reproduced in miniature before and couldn’t find any advice on the internet. Even the place I buy my stained glass from were very sceptical about my chances of success. Nonetheless I was determined to at least try.
I made up artwork using a combination of Powerpoint and Microsoft Paint. I tried many other dedicated graphics packages but Powerpoint has just the tools you need for simple design although it doesn’t allow you to mirror the image. MS Paint does just that so by using a combination of the two it was possible to produce a fairly professional looking drawing. It also gave me opportunity to stretch the design to fit my 30” limit and to modify one or two of the very fine details which were clearly going to impossible to replicate in miniature.
|
|
|
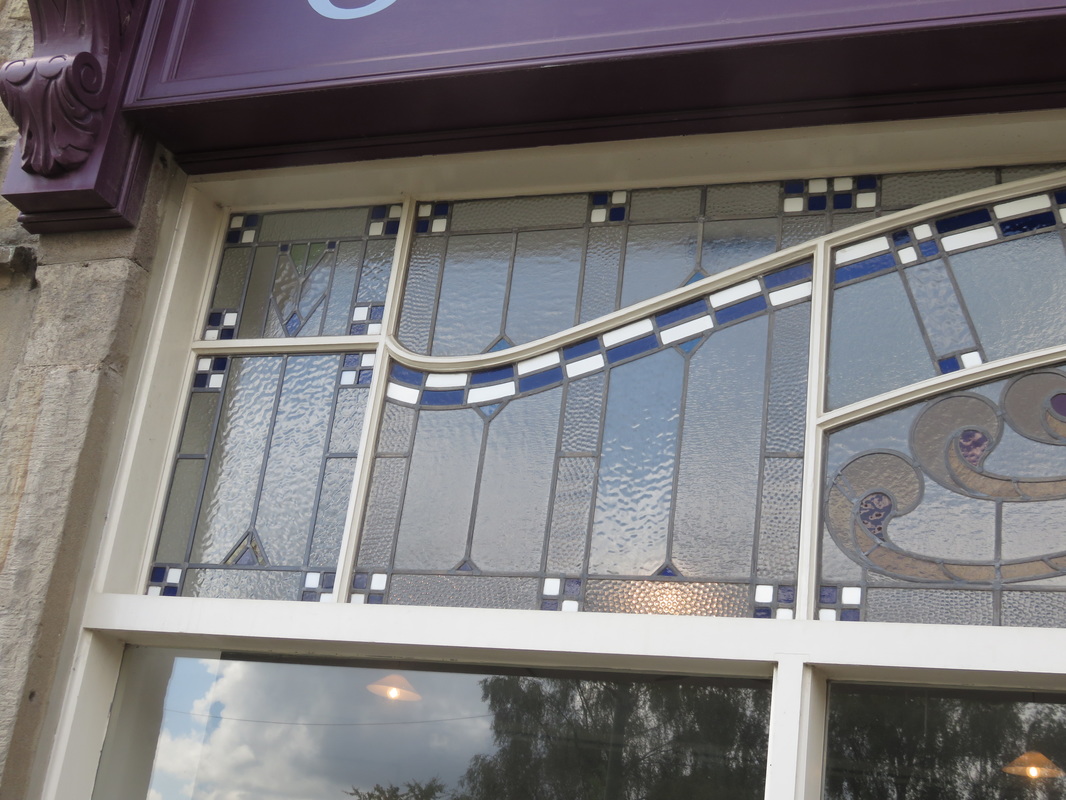
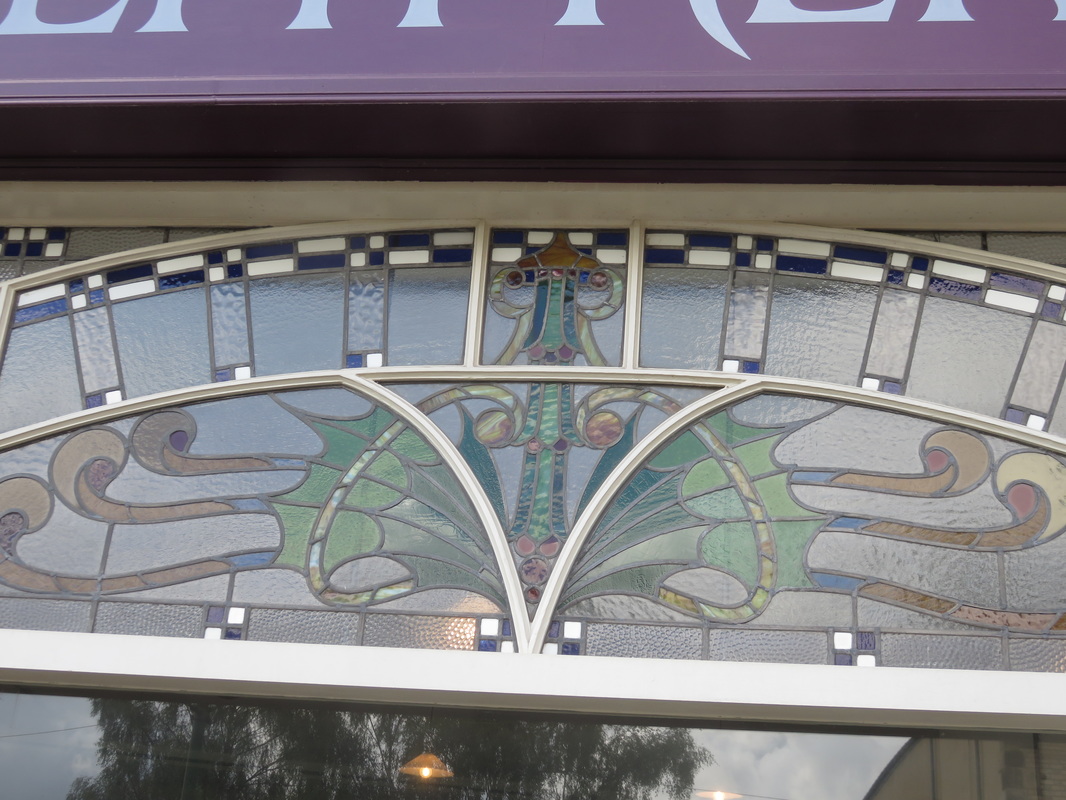
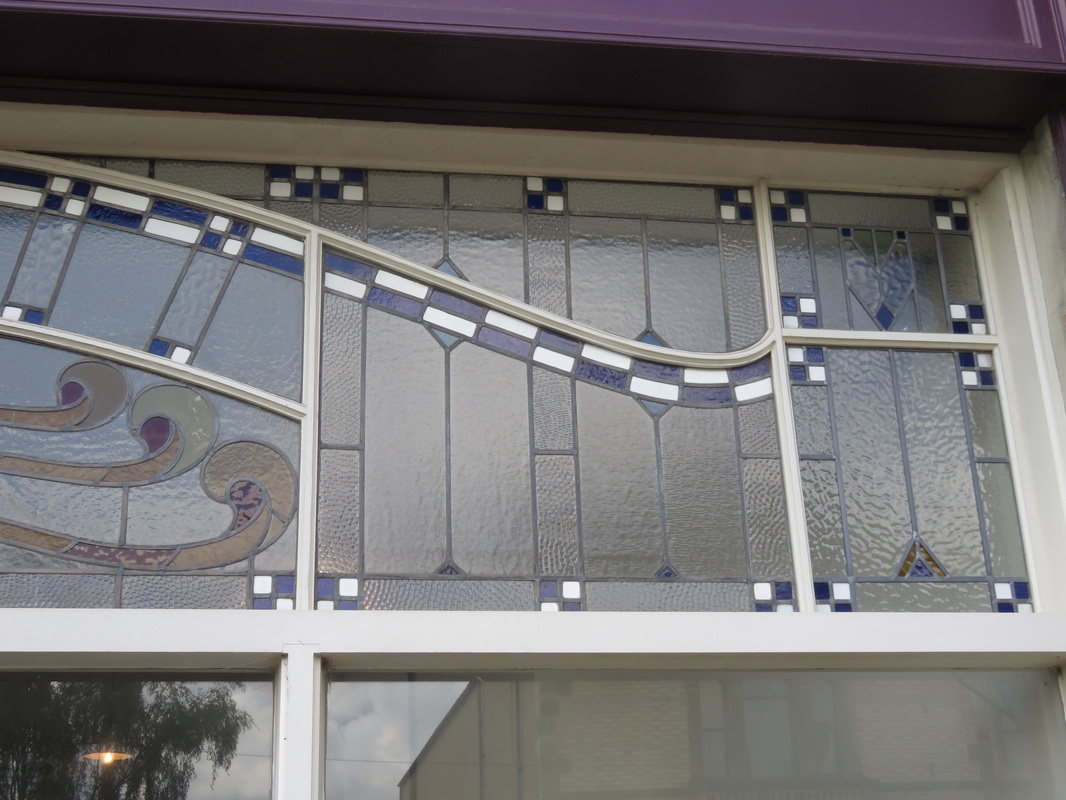
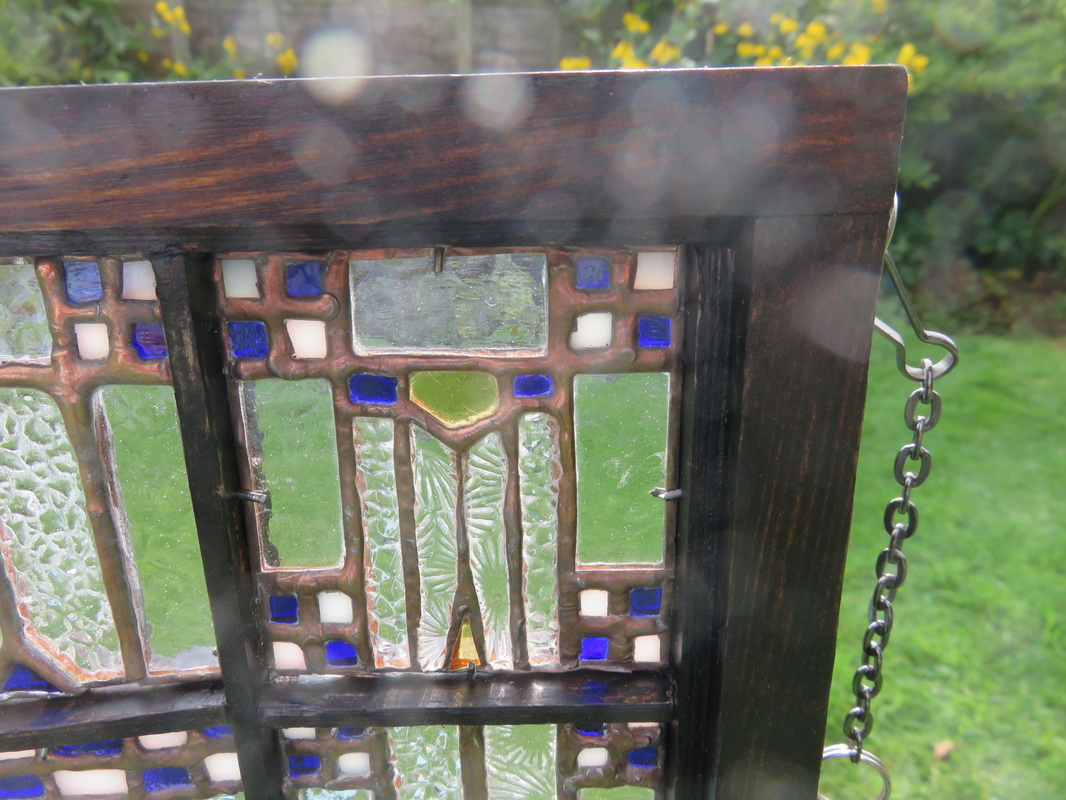
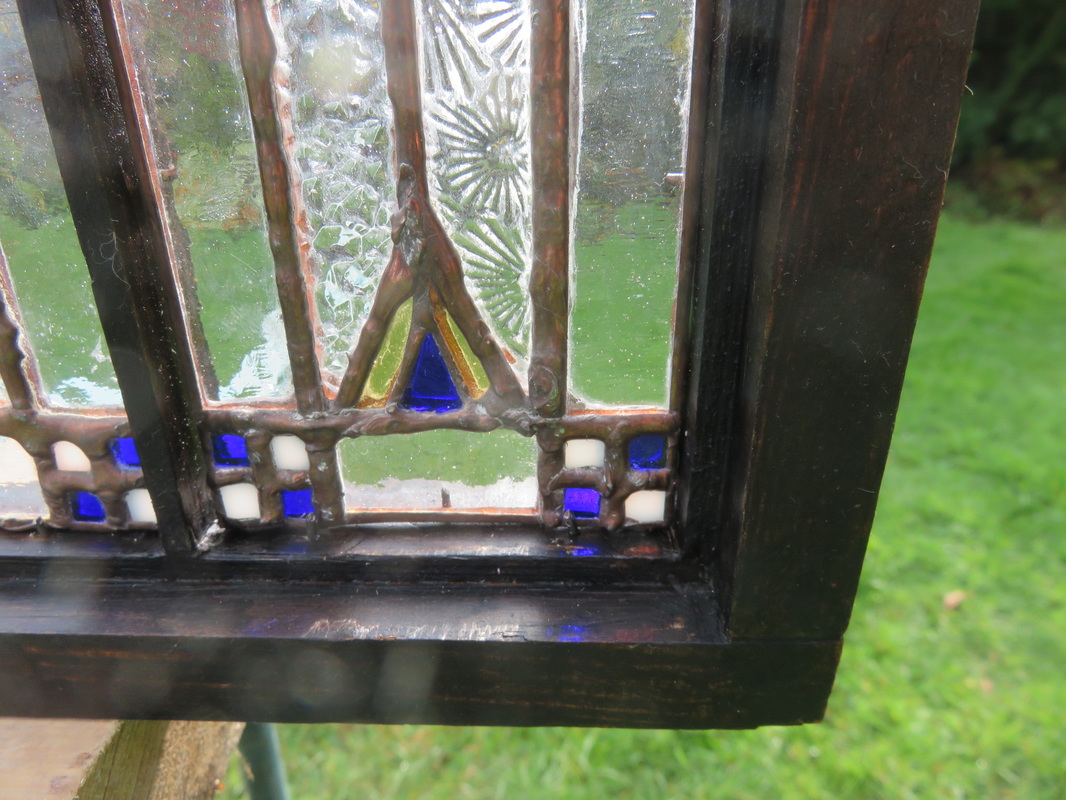
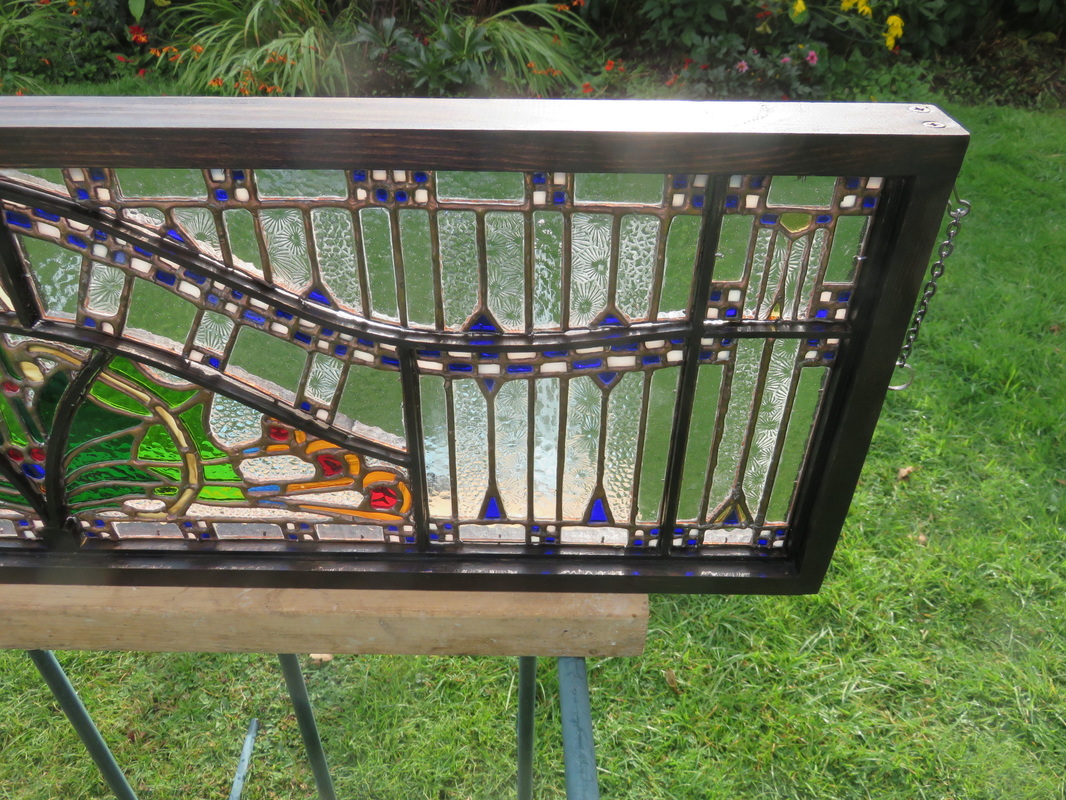
The original full sized window in Beamish on which my model is based

|
|
|
|
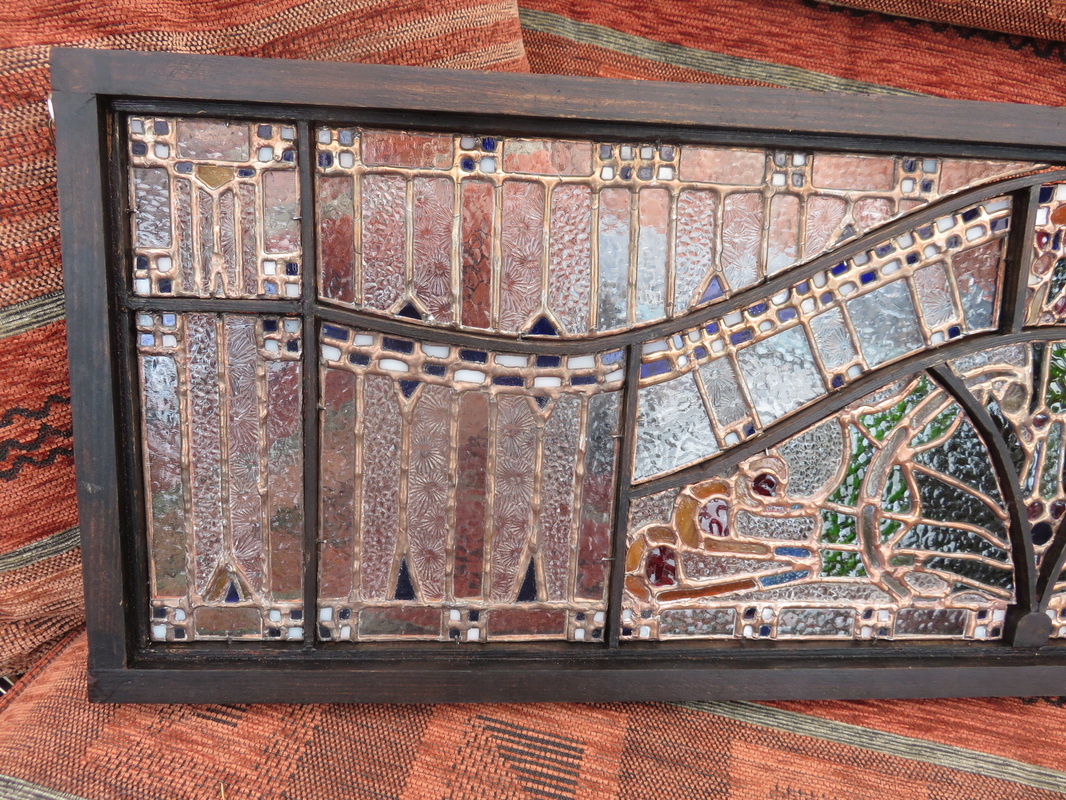
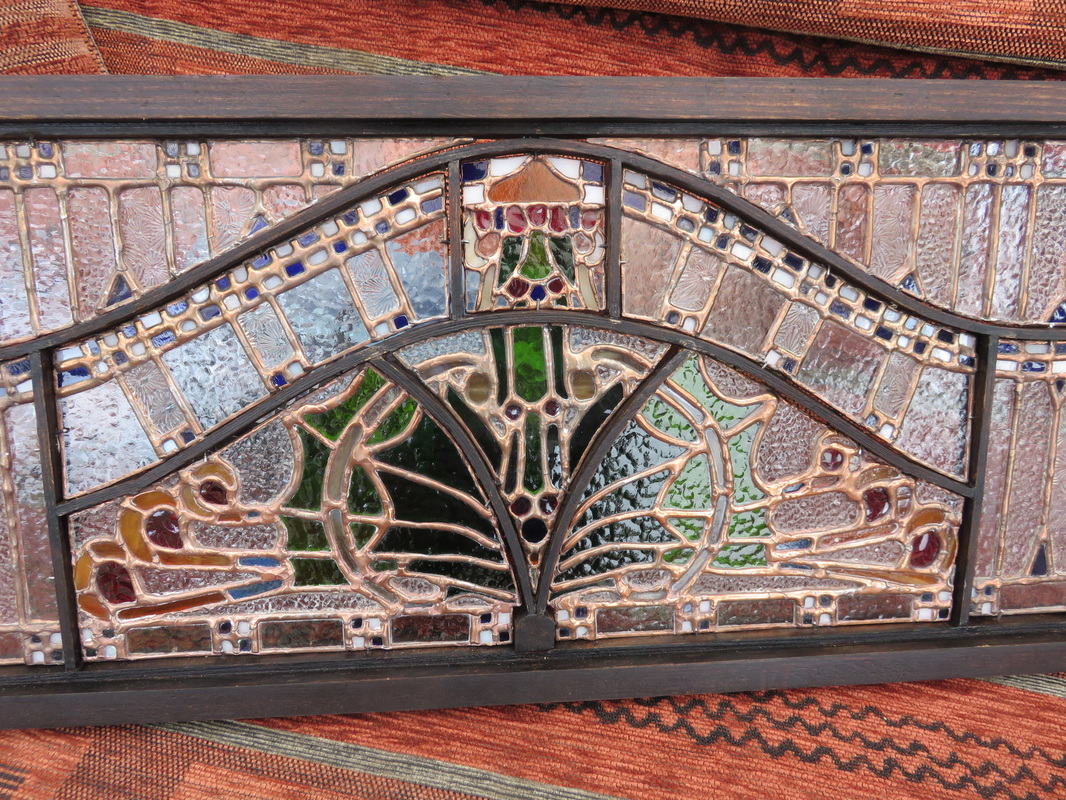
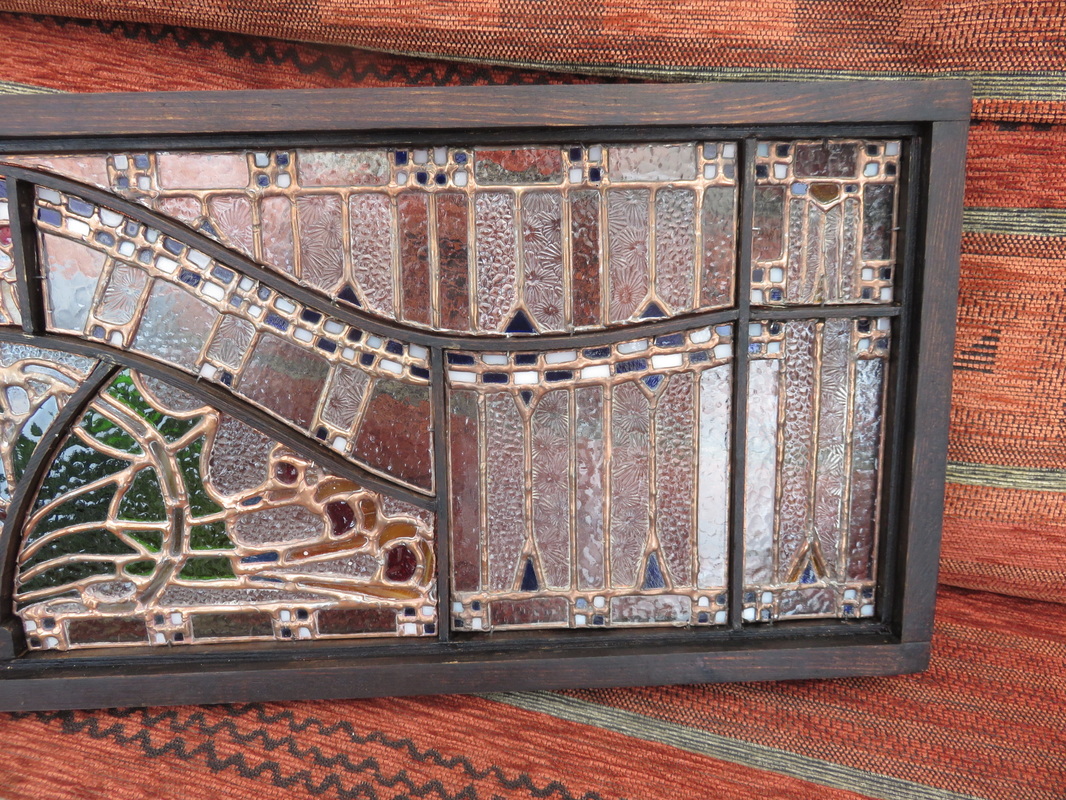
If you compare with the original window you will see that some of the fine details had to be modified
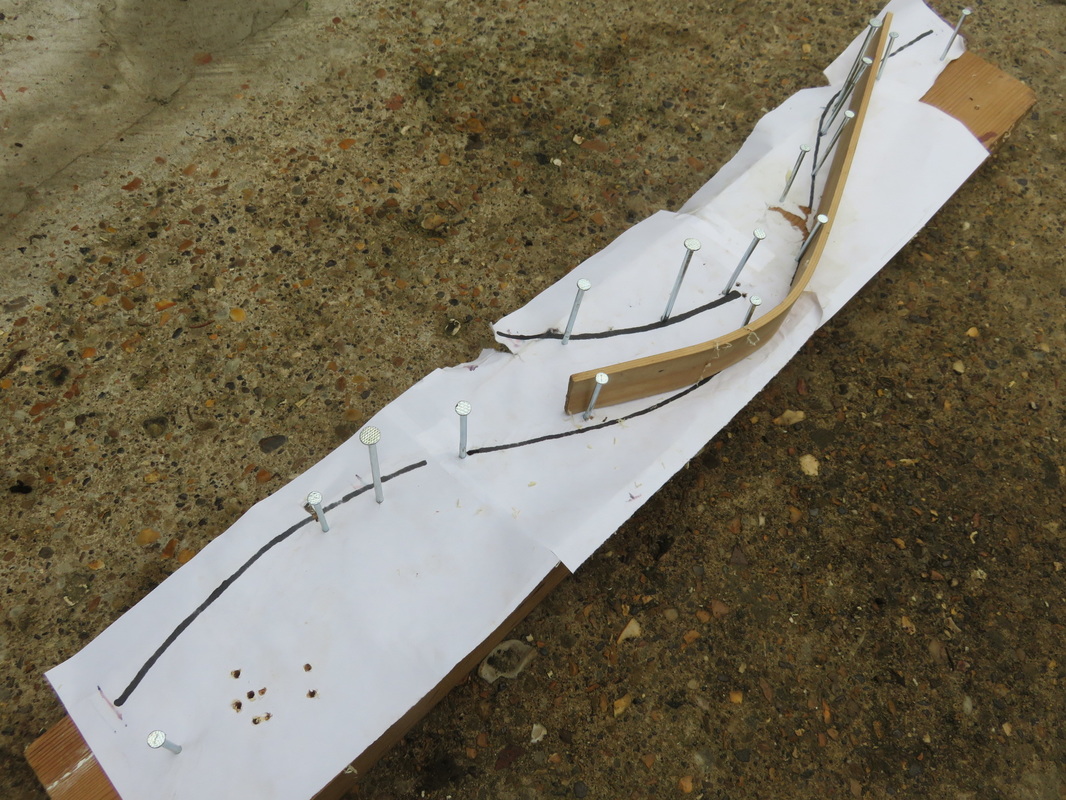
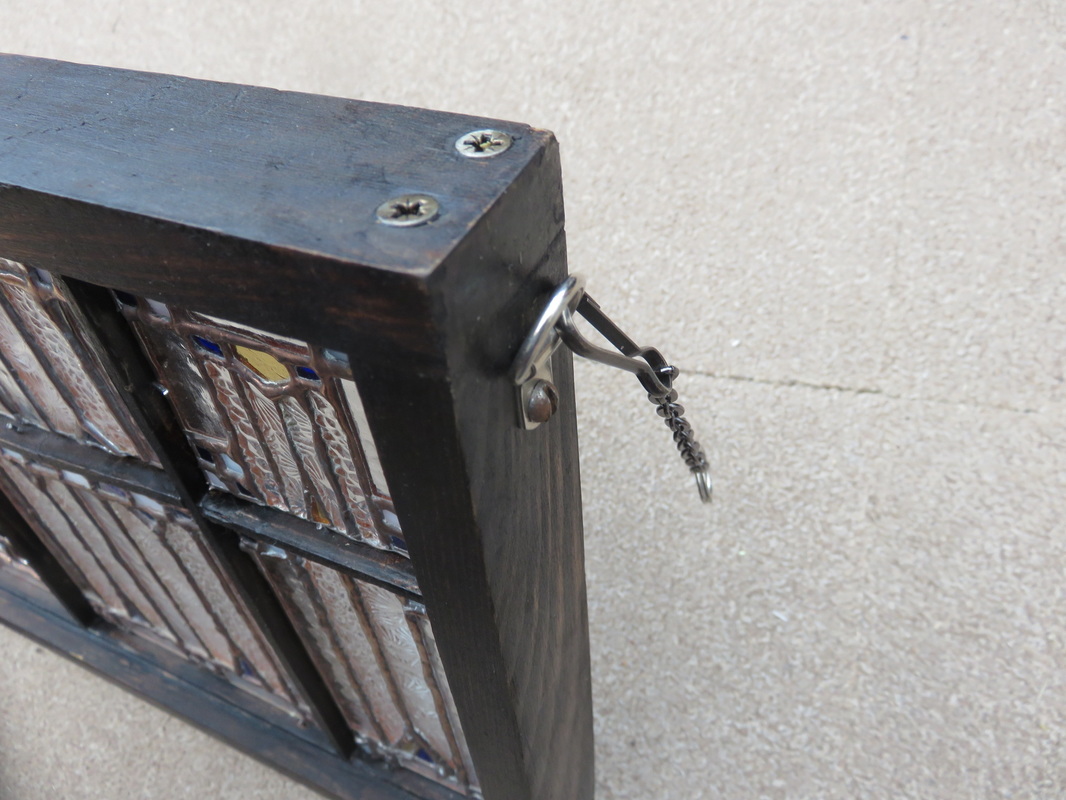
I started out with the challenge of the framework. I did consider using plaster or concrete but I’ve tried this before without a great deal of success. Moulding needs a good model in the first place which is exactly what I’m trying to make. I settled on wood since I knew it was possible to bend timber using a mixture of pressure, water and heat. I read the theory and selected thin laths which would bend easily. The square frame and uprights were comparatively easy although maintaining the stability of the structure wasn’t I ended up pinning all my joints with small panel pins before gluing then with both superglue and PVA adhesive. All I had to add now were the bent sections.
|
I soaked my wood overnight in warm water and made a jig of nails around which to bend it. It’s somewhat of an inexact science though for a beginner like me and the end results weren’t perfect or totally symmetrical. But after a few trial attempts I managed to produce a couple of pieces which were almost the same as my drawing – especially when they were pinned and glued into position under stress. Even so it meant that the struts didn’t exactly match my drawings so in a few areas I had to compensate for that fact when cutting my glass. |
|
The frame has been surprisingly stable when finished but I did learn to my costs that I should have added the retaining pins which hold the glass panels in place prior to assembly. I ended up having to hammer them in the finished model which was a scary experience bearing in mind the fragility of the joints.
|
|
|
|
|
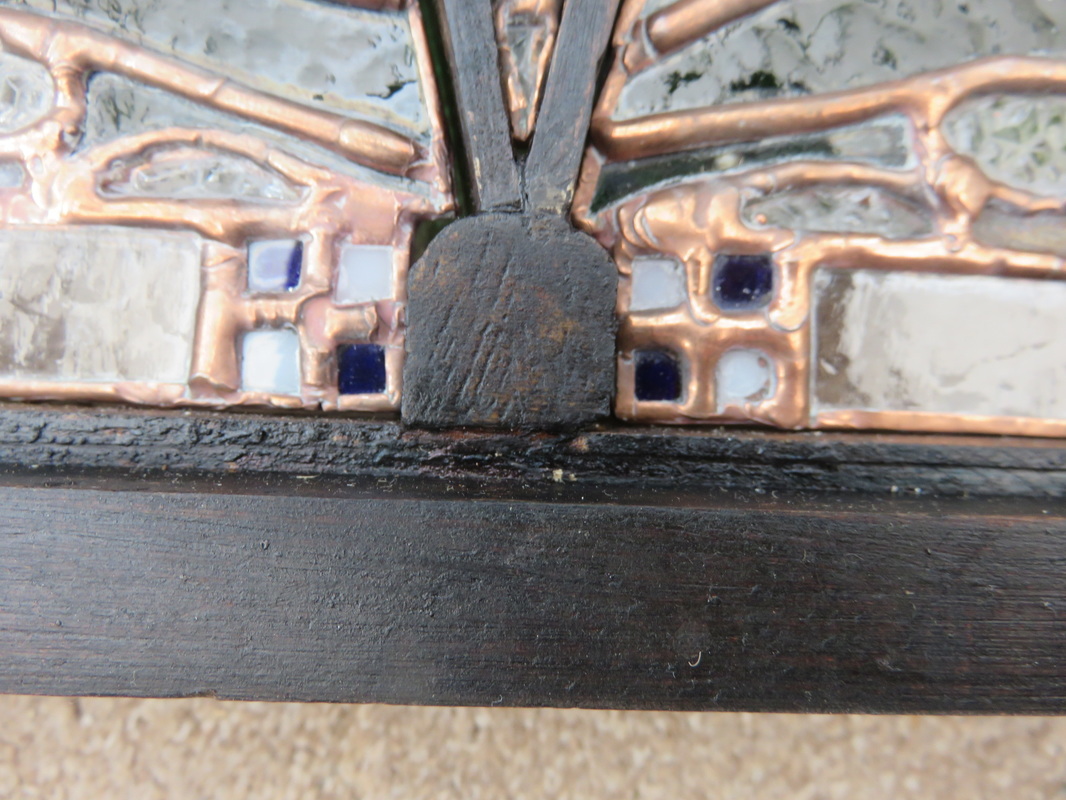
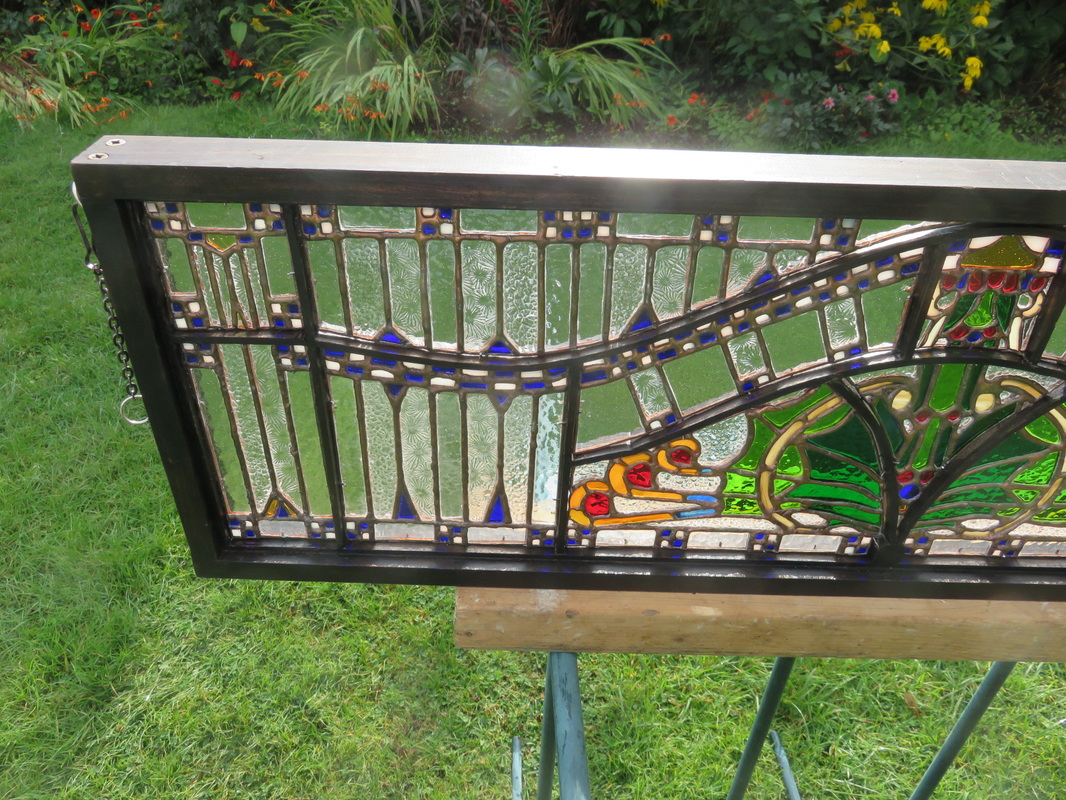
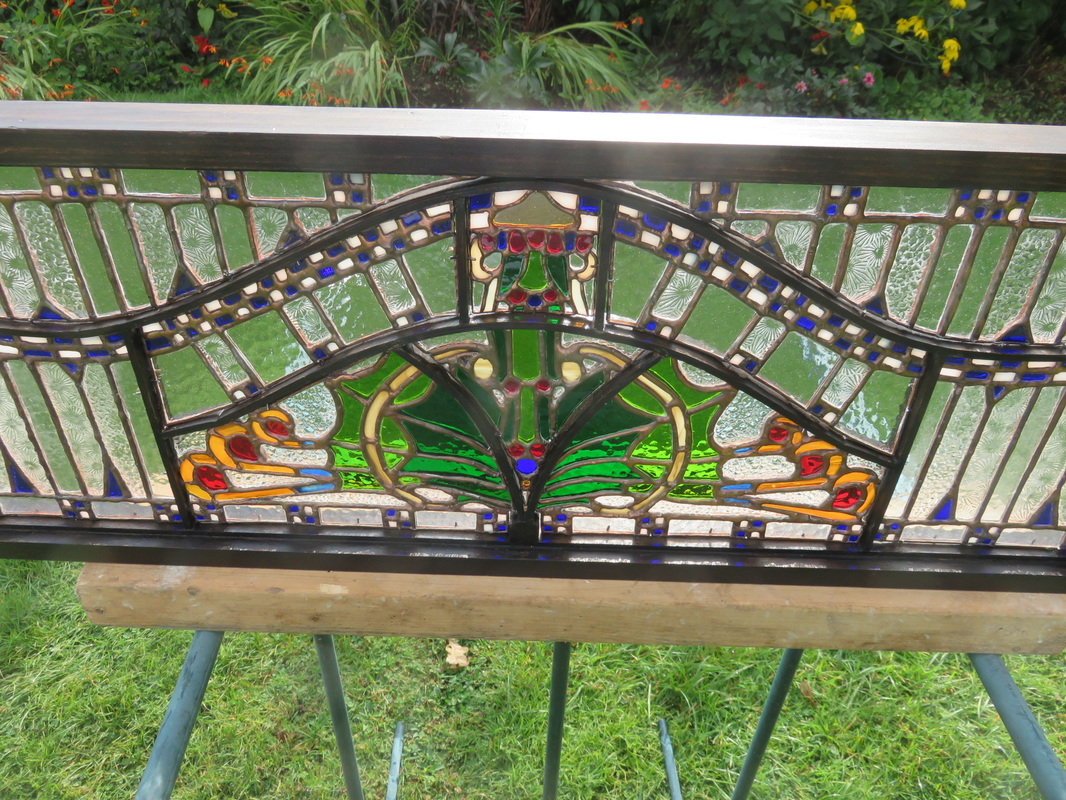
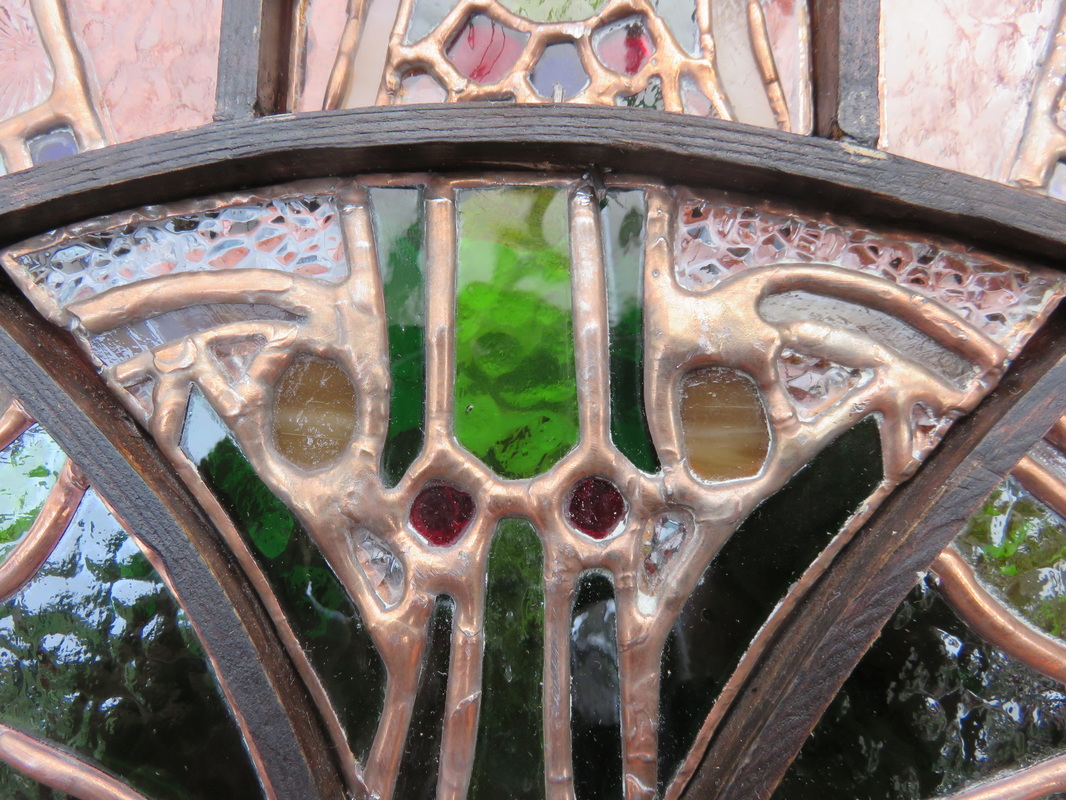
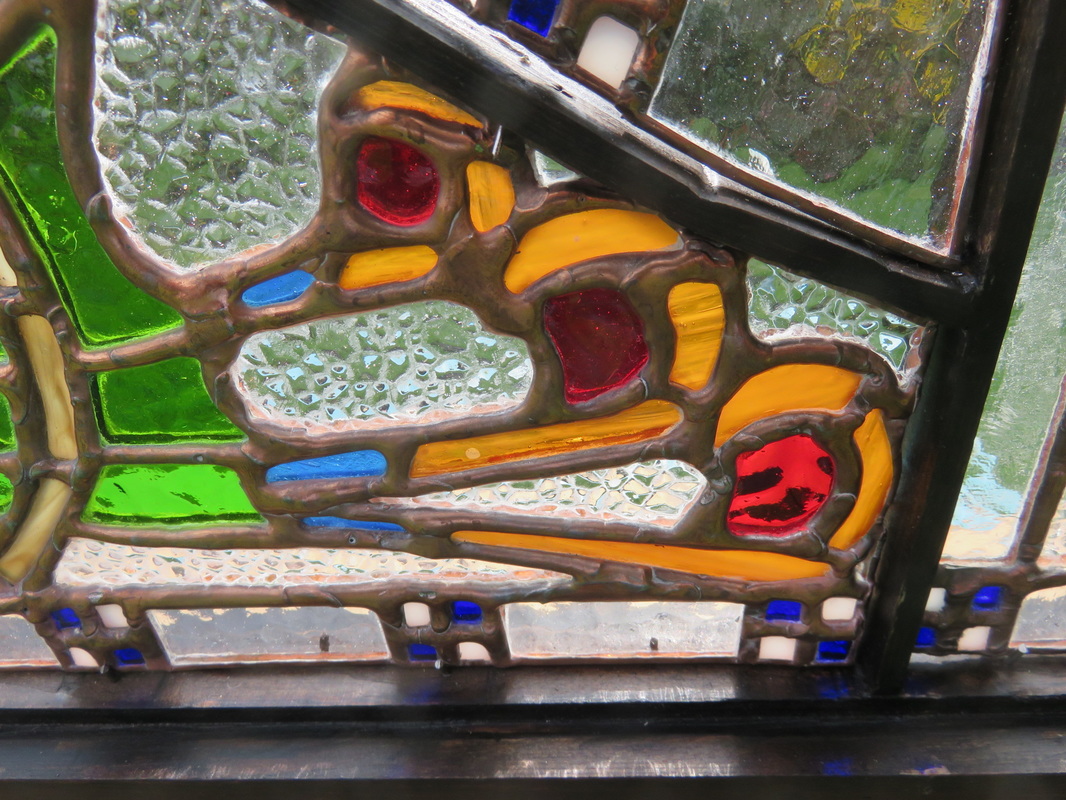
Cutting the glass was straightforward but fiddly. Some of the small pieces were really too small to be usable but I needed them to fill the shape. One mistake I did make was to lead both sides of the window panels. In reality it’s going to be viewed from one side only since my textured clear glass in intended to be viewed from the front, so I wasted a lot of money unnecessarily on lead solder.
Another mistake was to use copper backed foil rather than black since it meant that I had to apply a copper patina to each finished piece. It looks fine now but it would have looked just as good in black.
Each of the panels took about a day and half solid work so this wasn’t a quick project and in total there are some three hundred plus pieces all cut and shaped by hand.
|
|
|
I left the final finishing of the frame until the end. I still wasted sure whether to paint or varnish but finally decided to stain and wax. Again that was a bit of a mistake since the stain wouldn’t penetrate the joints which I had covered in PVA glue. Fortunately my stain was exactly the same shade as a dark permanent felt tipped pen I have and result is virtually invisible.


|

|
This really was a labour of love. I’m very pleased with the result and hope you like it as much as I do. It looks stunning in sunlight and is a lovely feature piece in the room. I did investigate the possibility of lighting it artificially from behind but eventually settled on hanging it in the conservatory window where it blocks a dark sheltered corner.
